VRM Cooling
Very soon after the completion of the initial build, I noticed one problem with it that I hadn’t considered before.
Due to the lack of air flow in the case, the motherboard’s voltage regulator modules (VRMs) around the CPU weren’t getting enough cooling. Reaching up to 80-90°C, they were technically still within the acceptable temperature range, but not by a large margin, so I wanted to improve the situation.
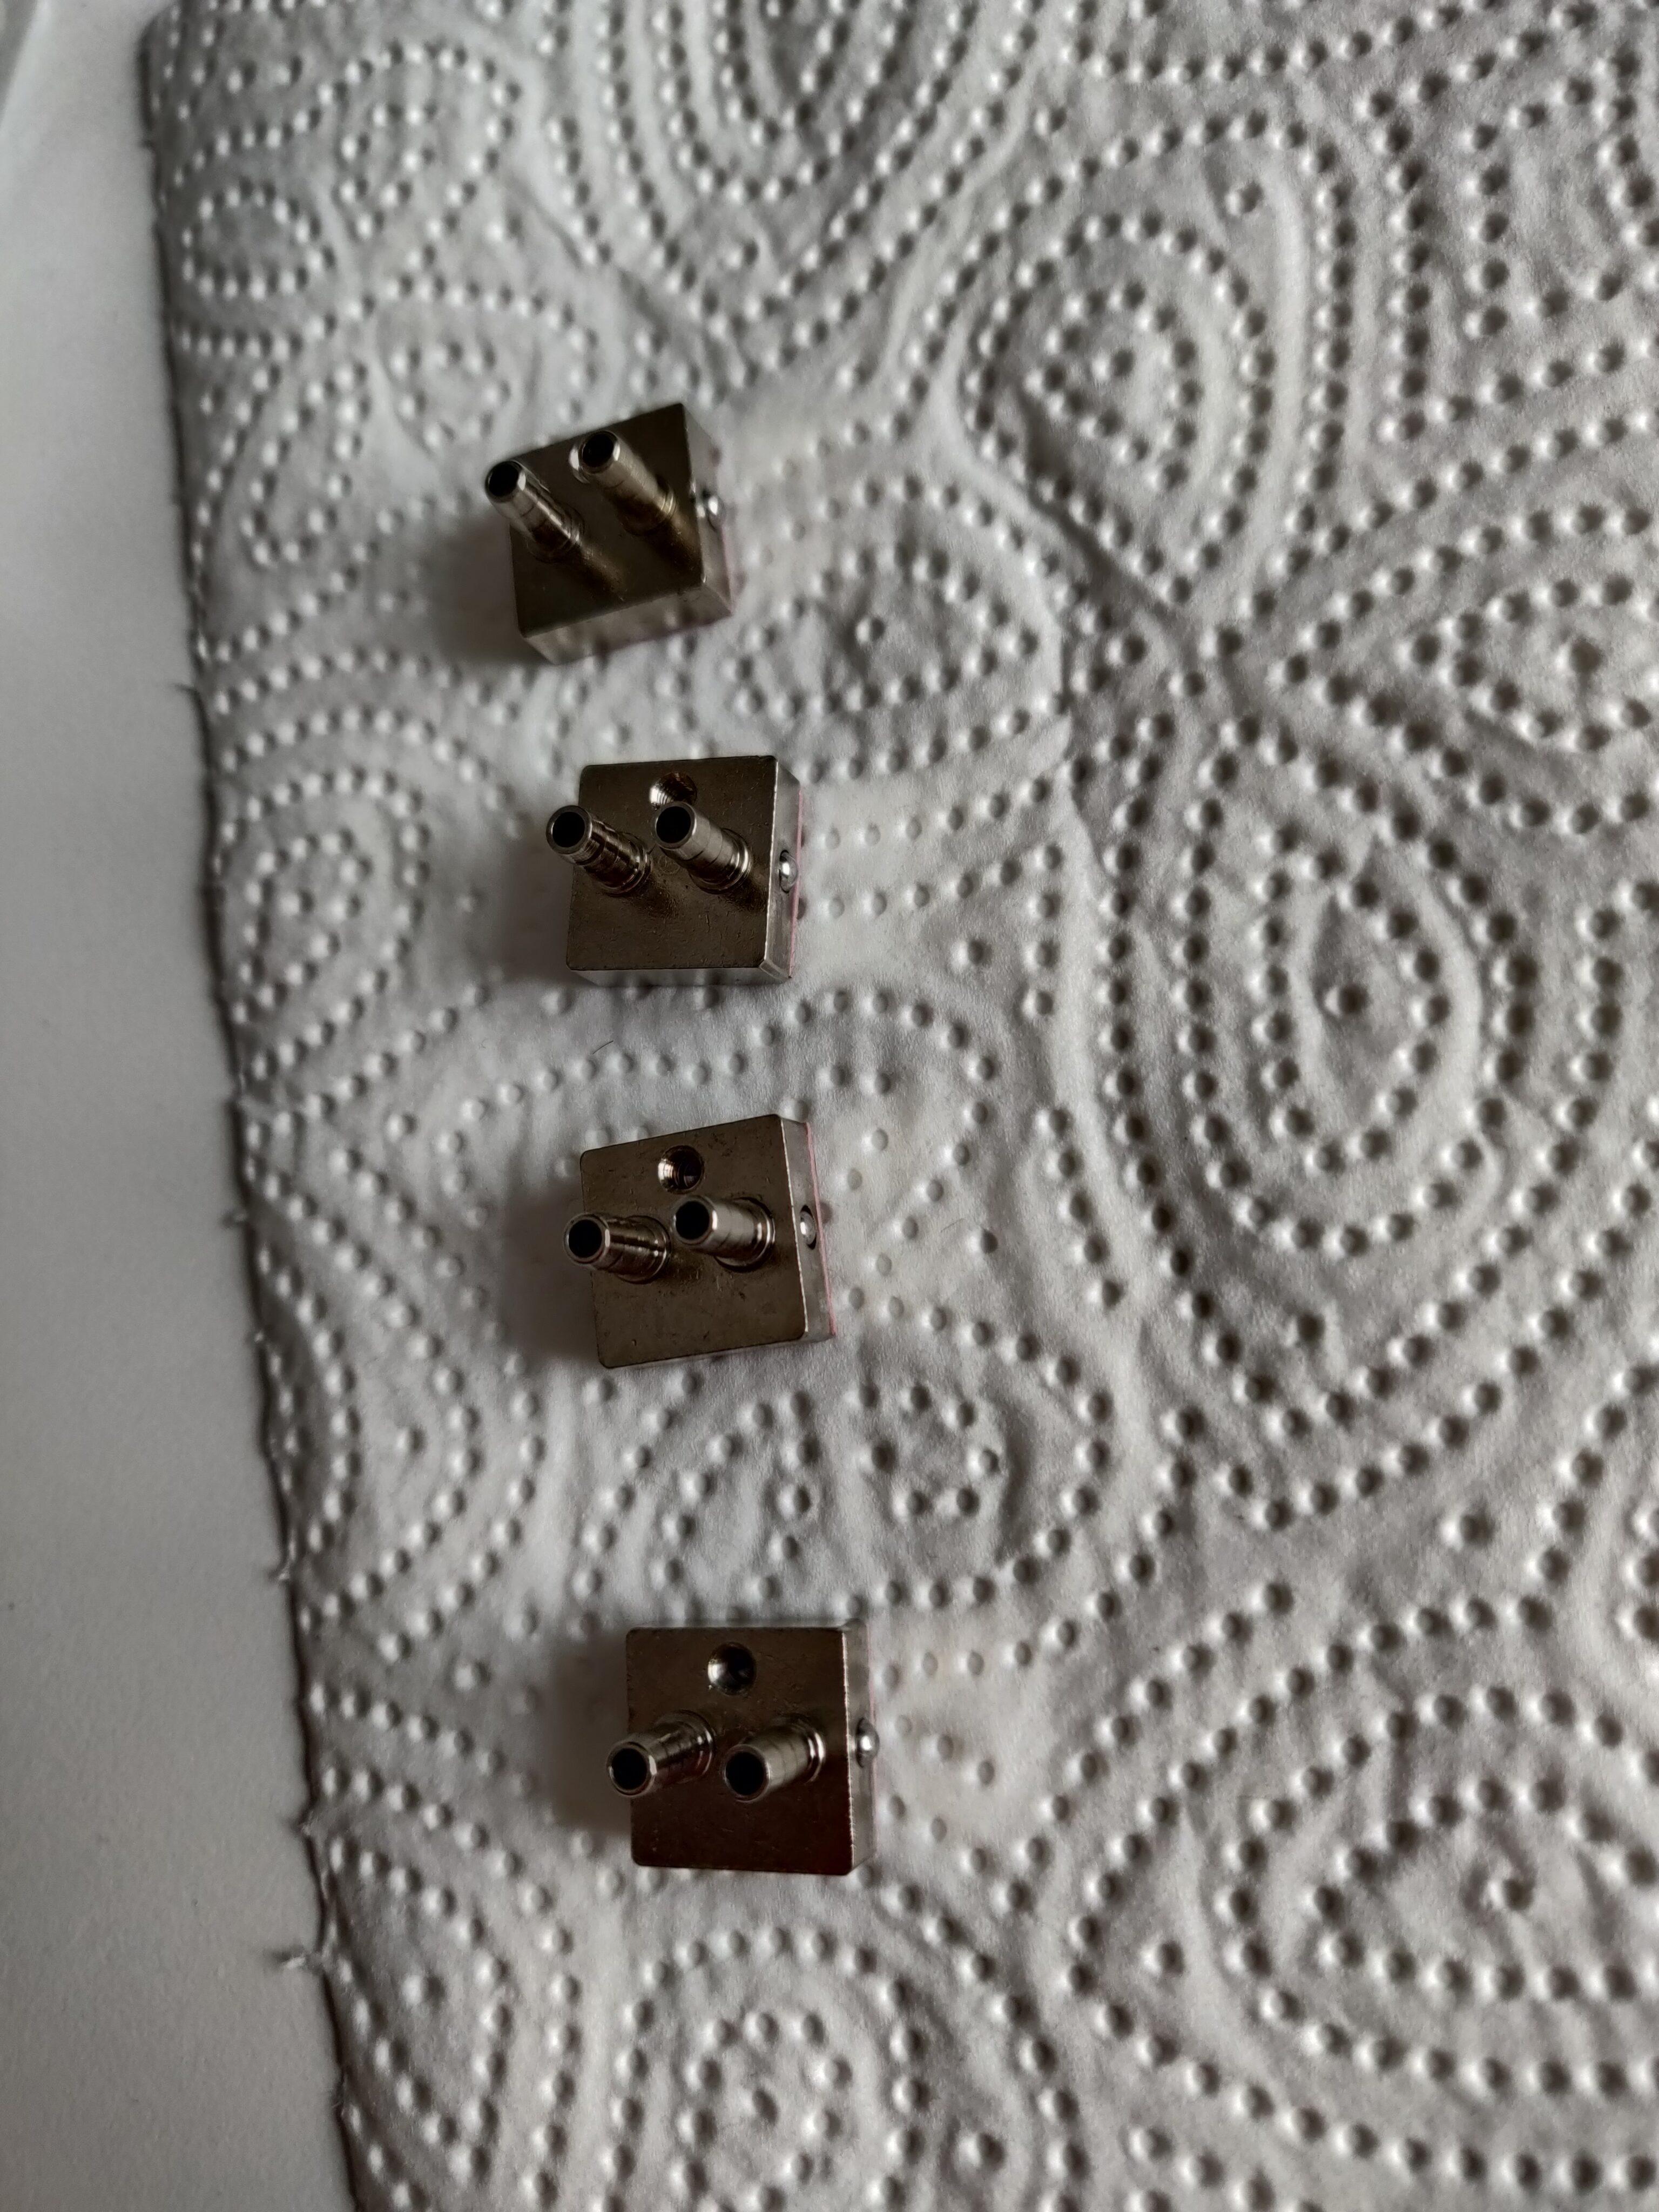
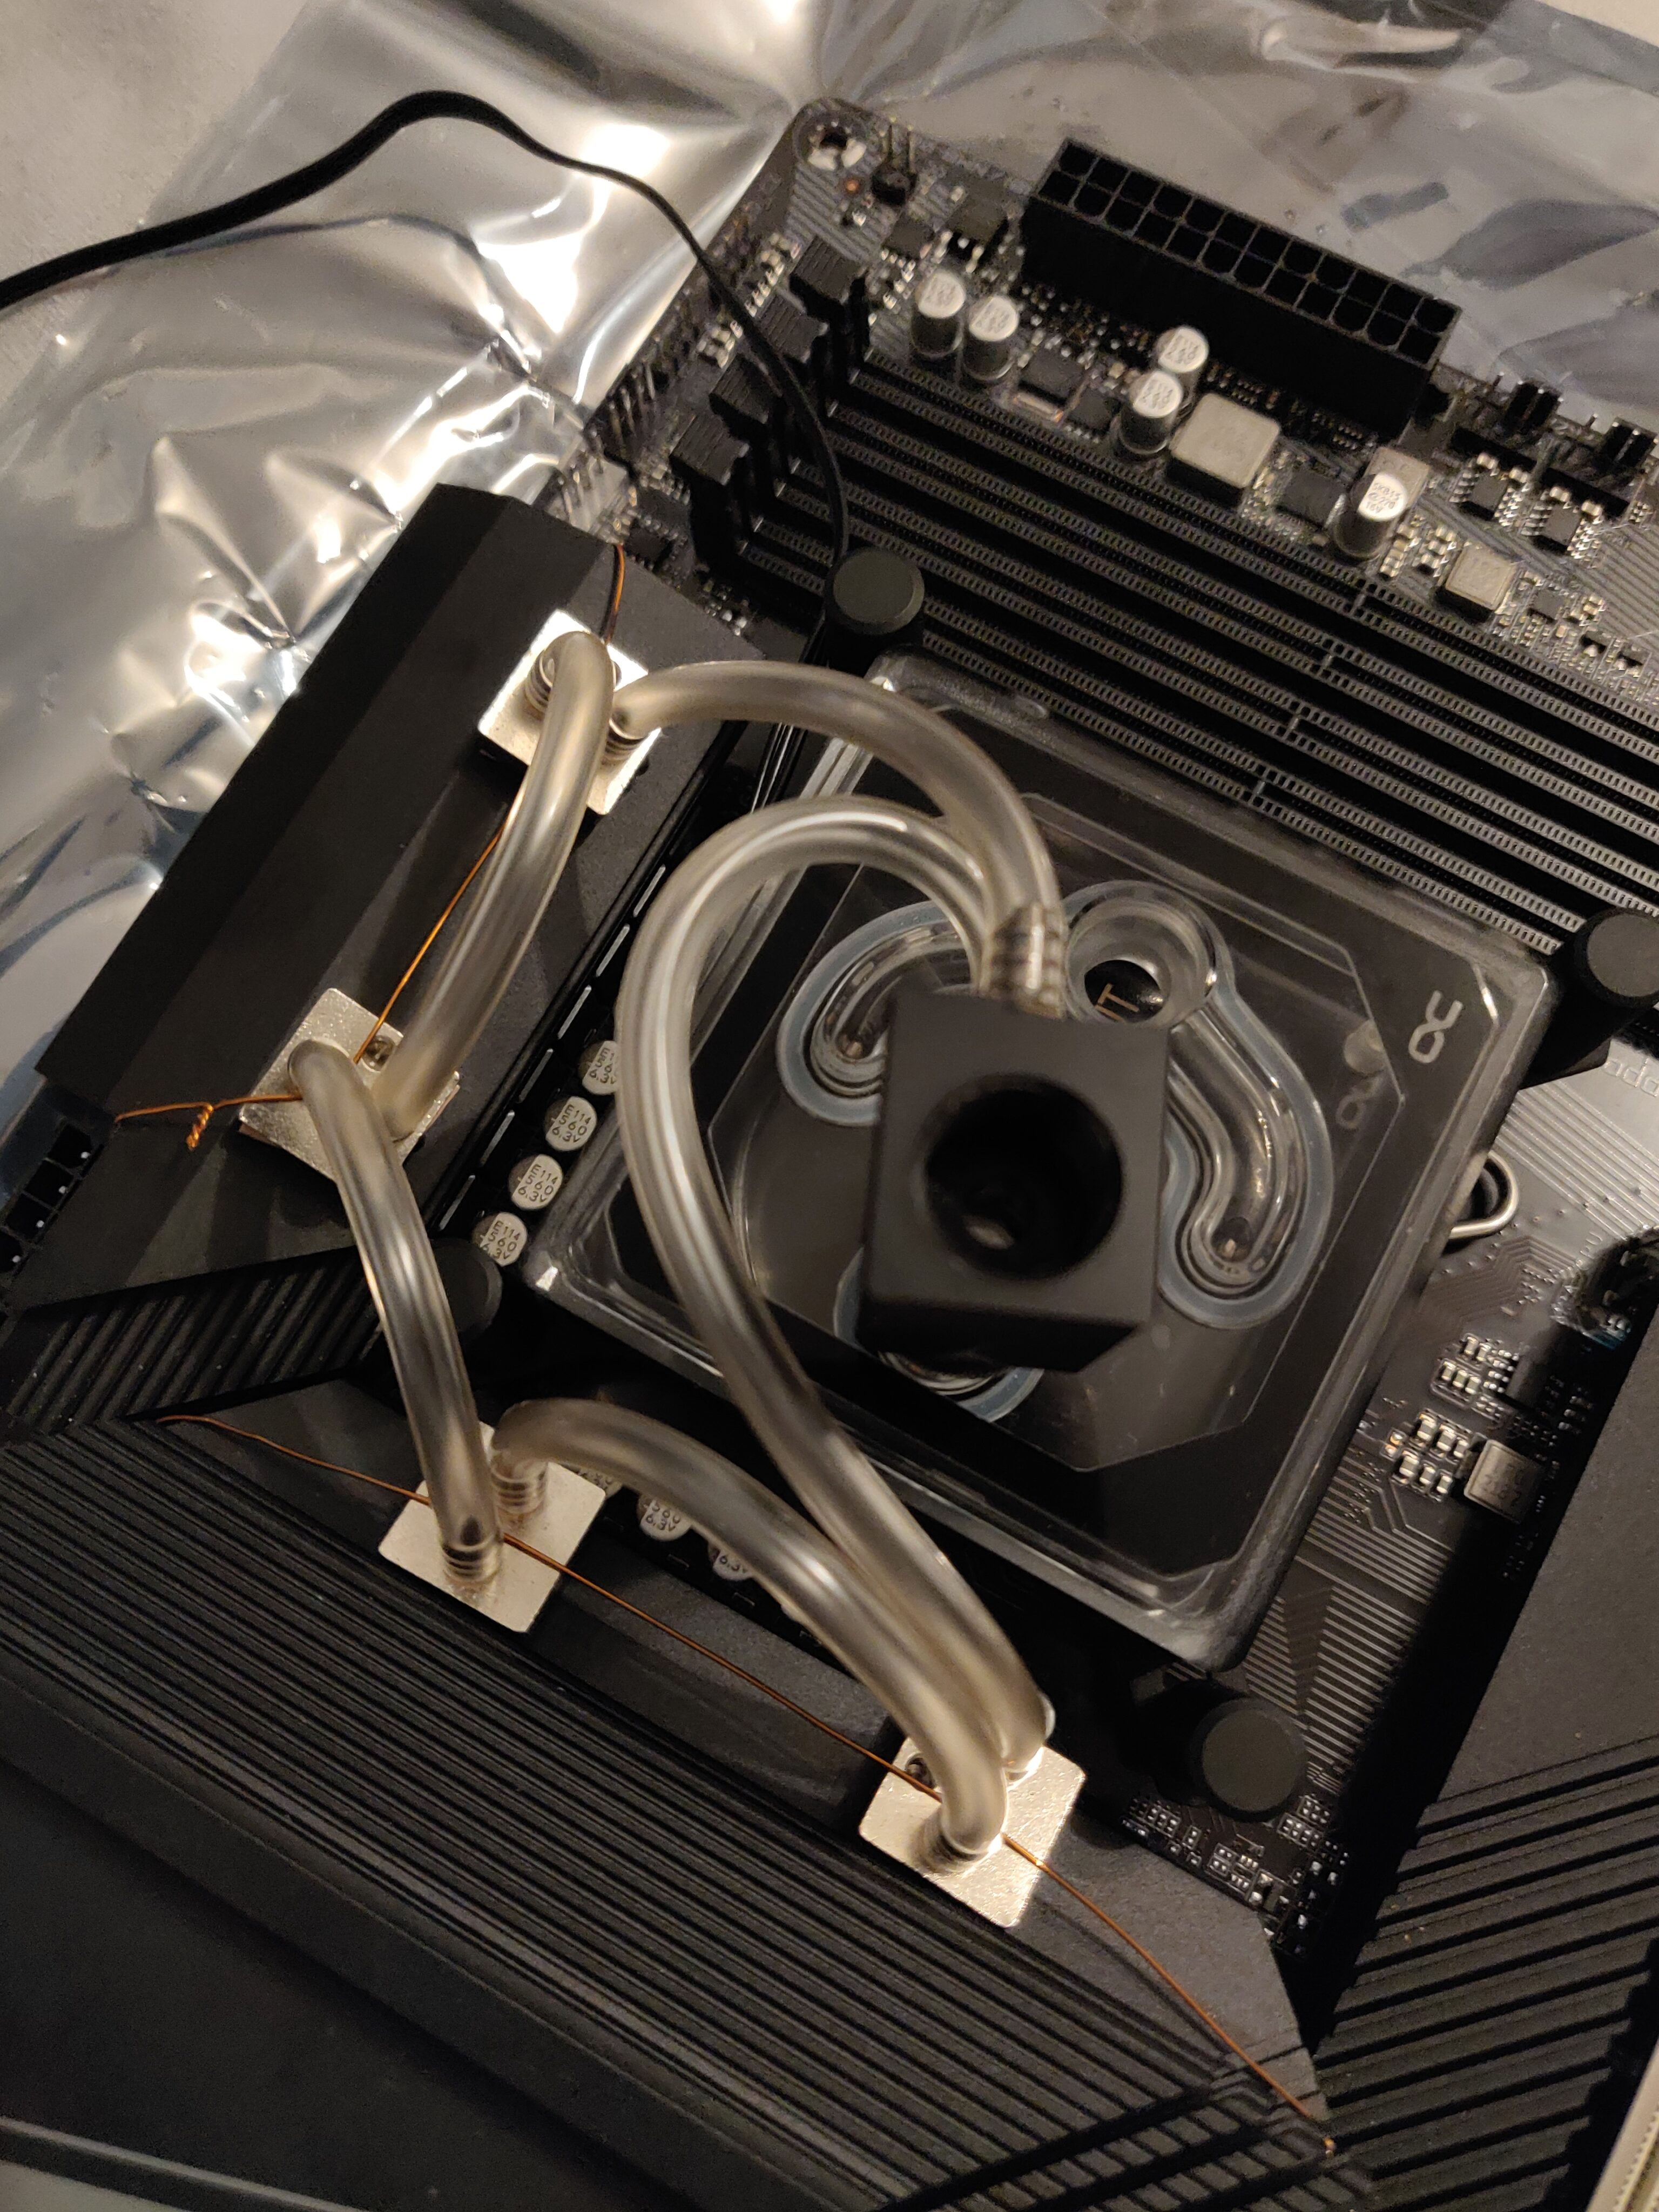
For this purpose, I decided to buy some miniature all-purpose liquid cooling blocks from Alphacool, along with some matching 5mm soft tubes and an adapter to incorporate them into the existing cooling loop.
These small cooling blocks were attached to the VRM heat sinks using thermal pads (and some wire to hold them in place better later), and the loop was partially drained to allow me to install them safely.
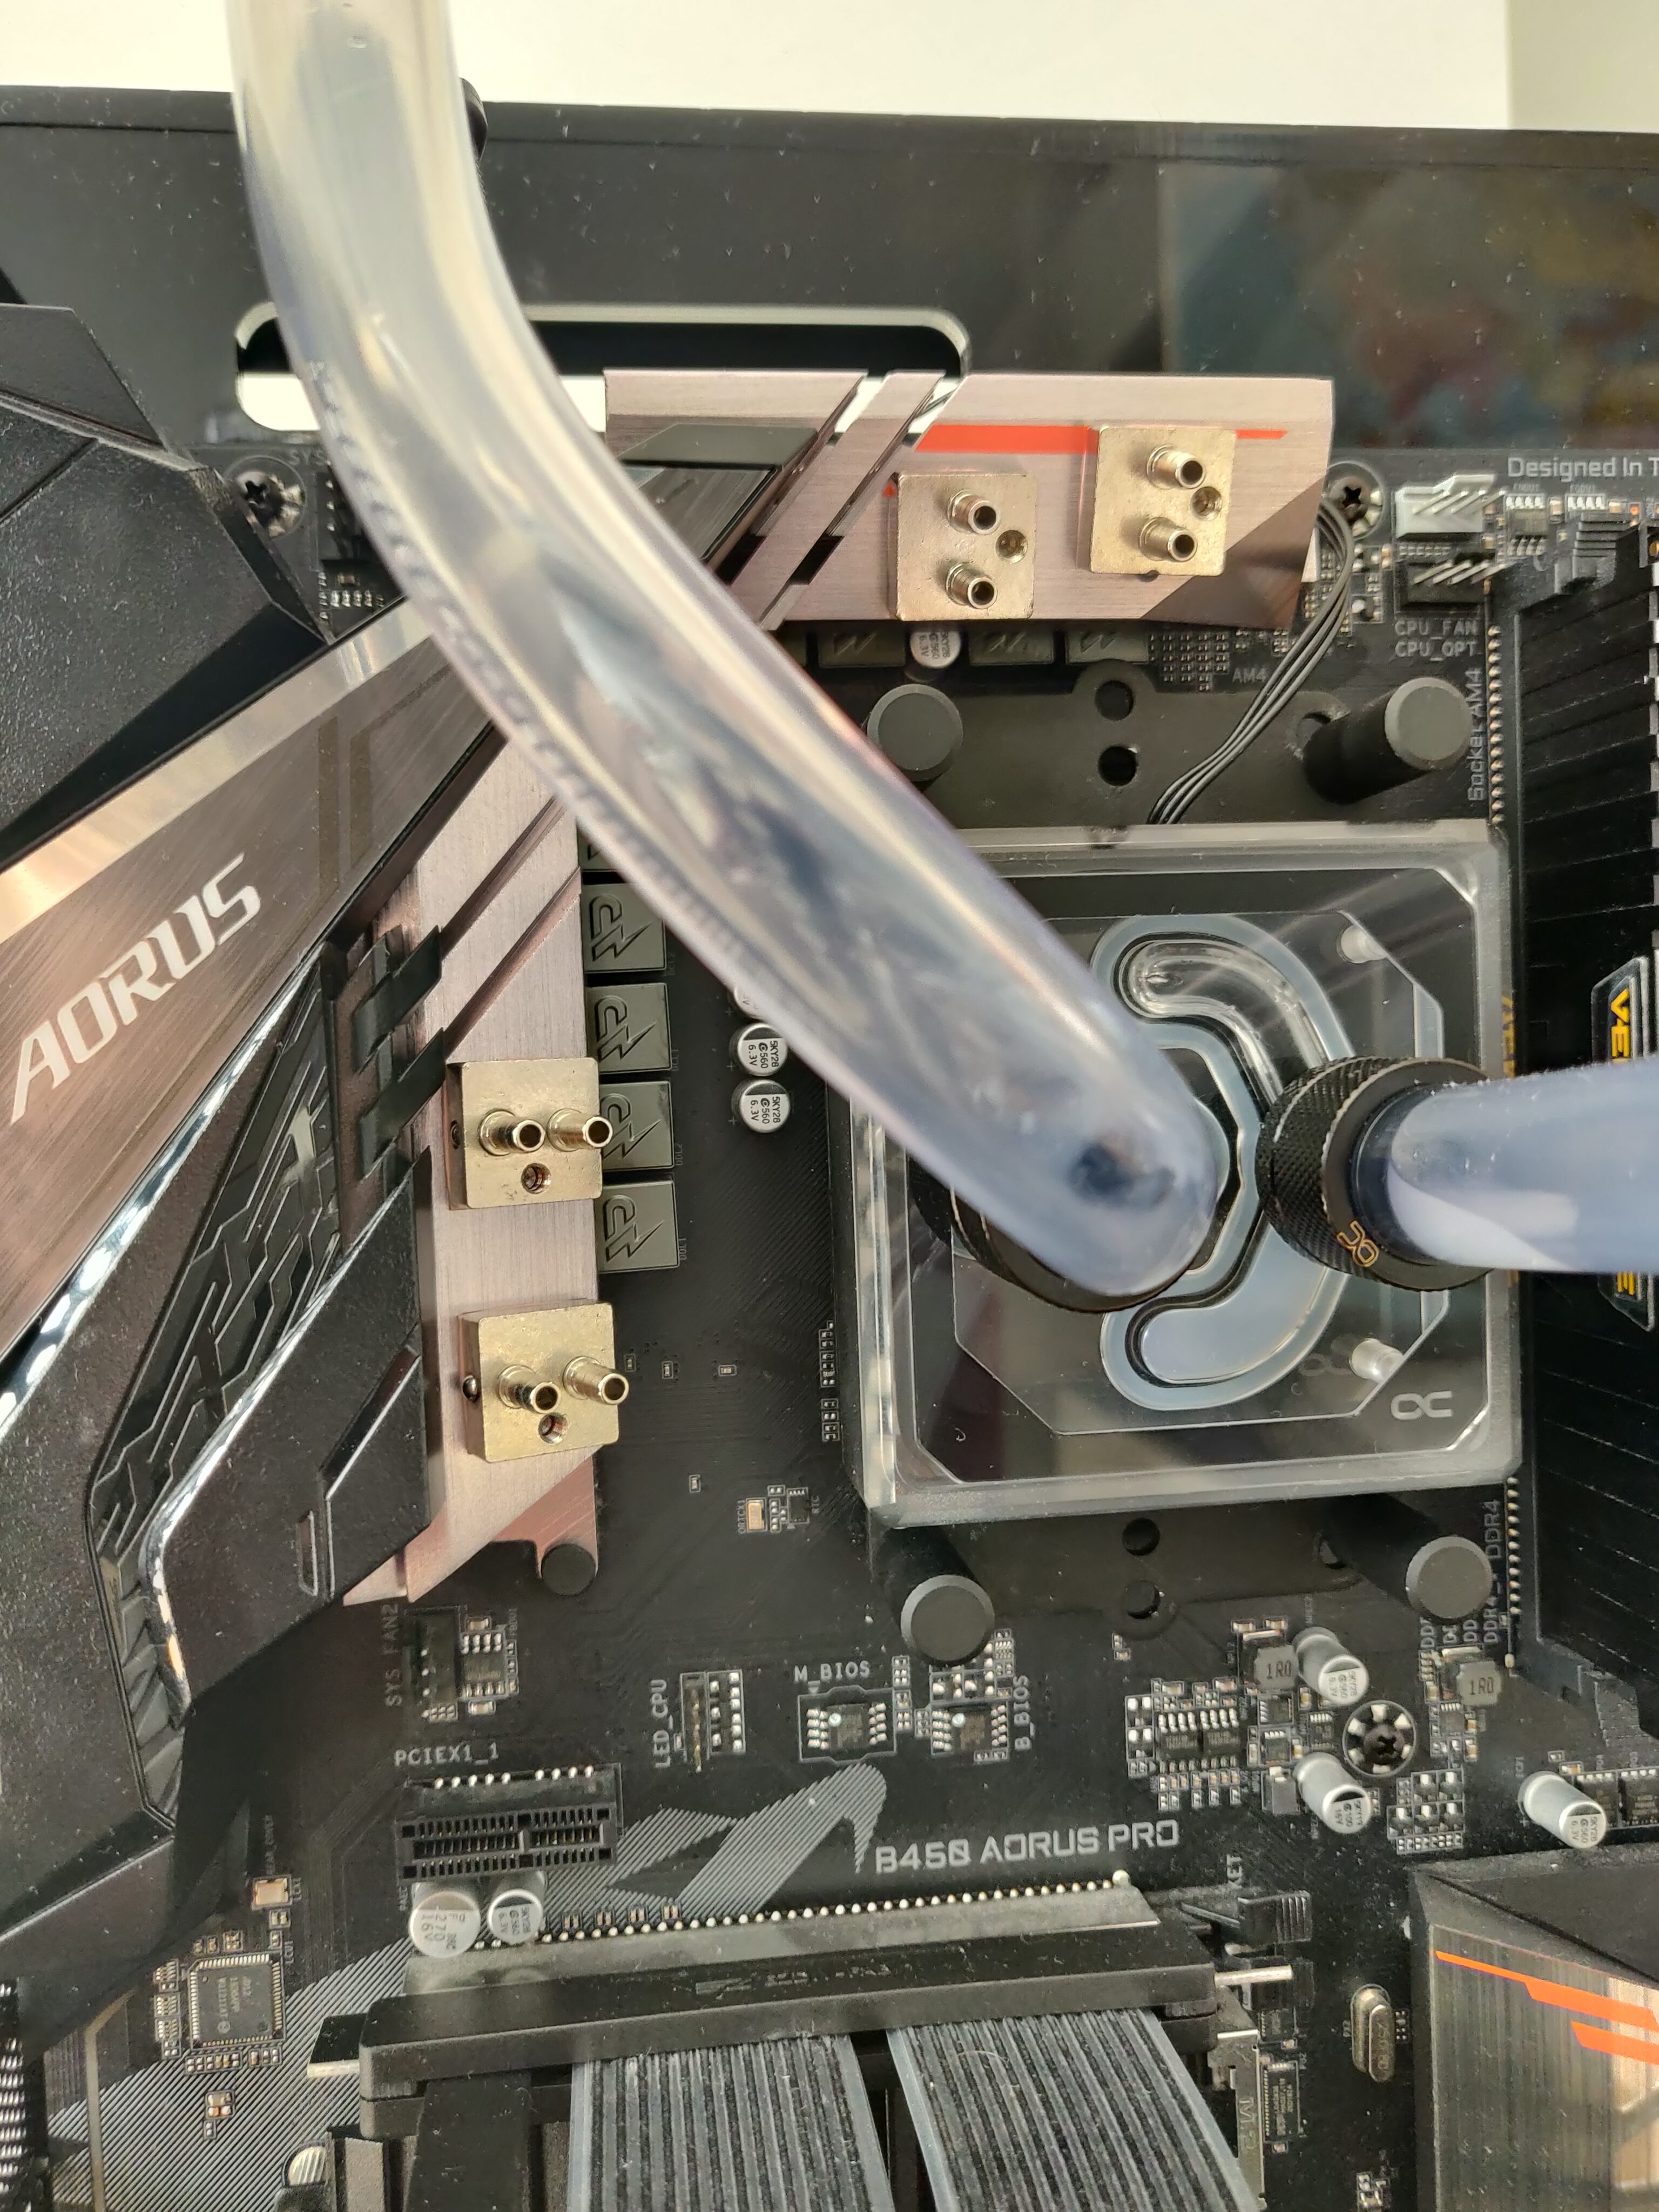
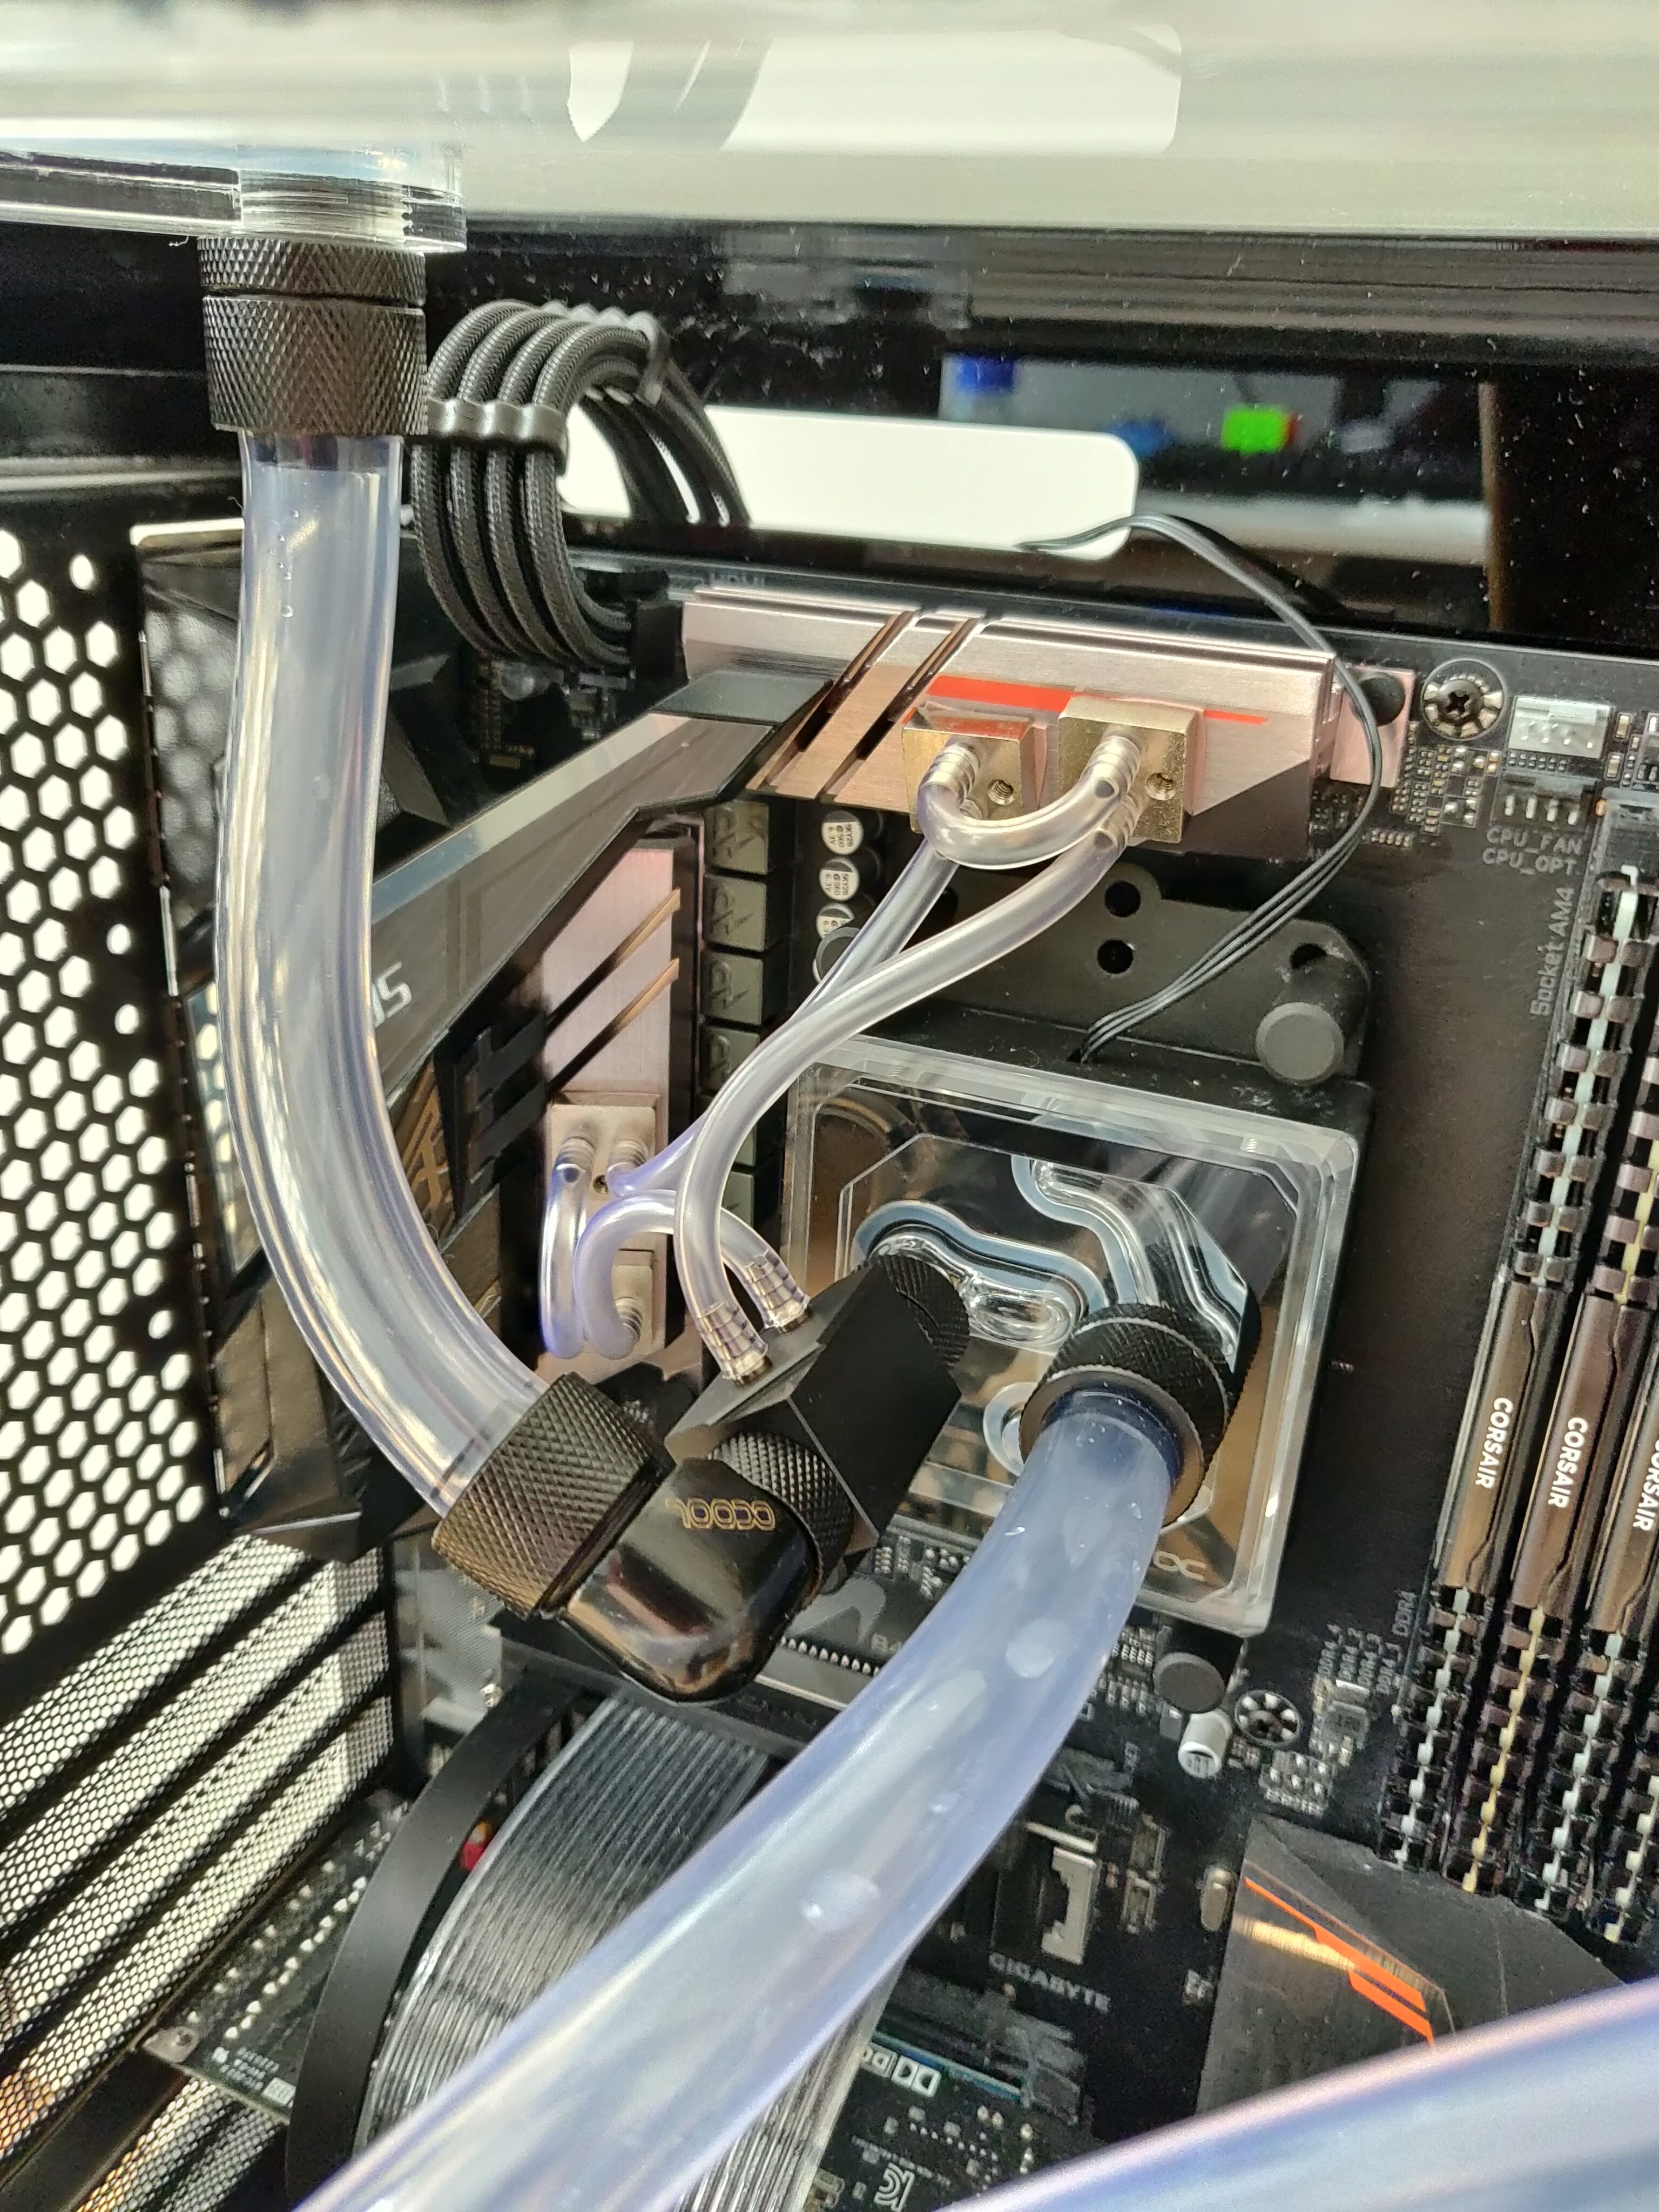
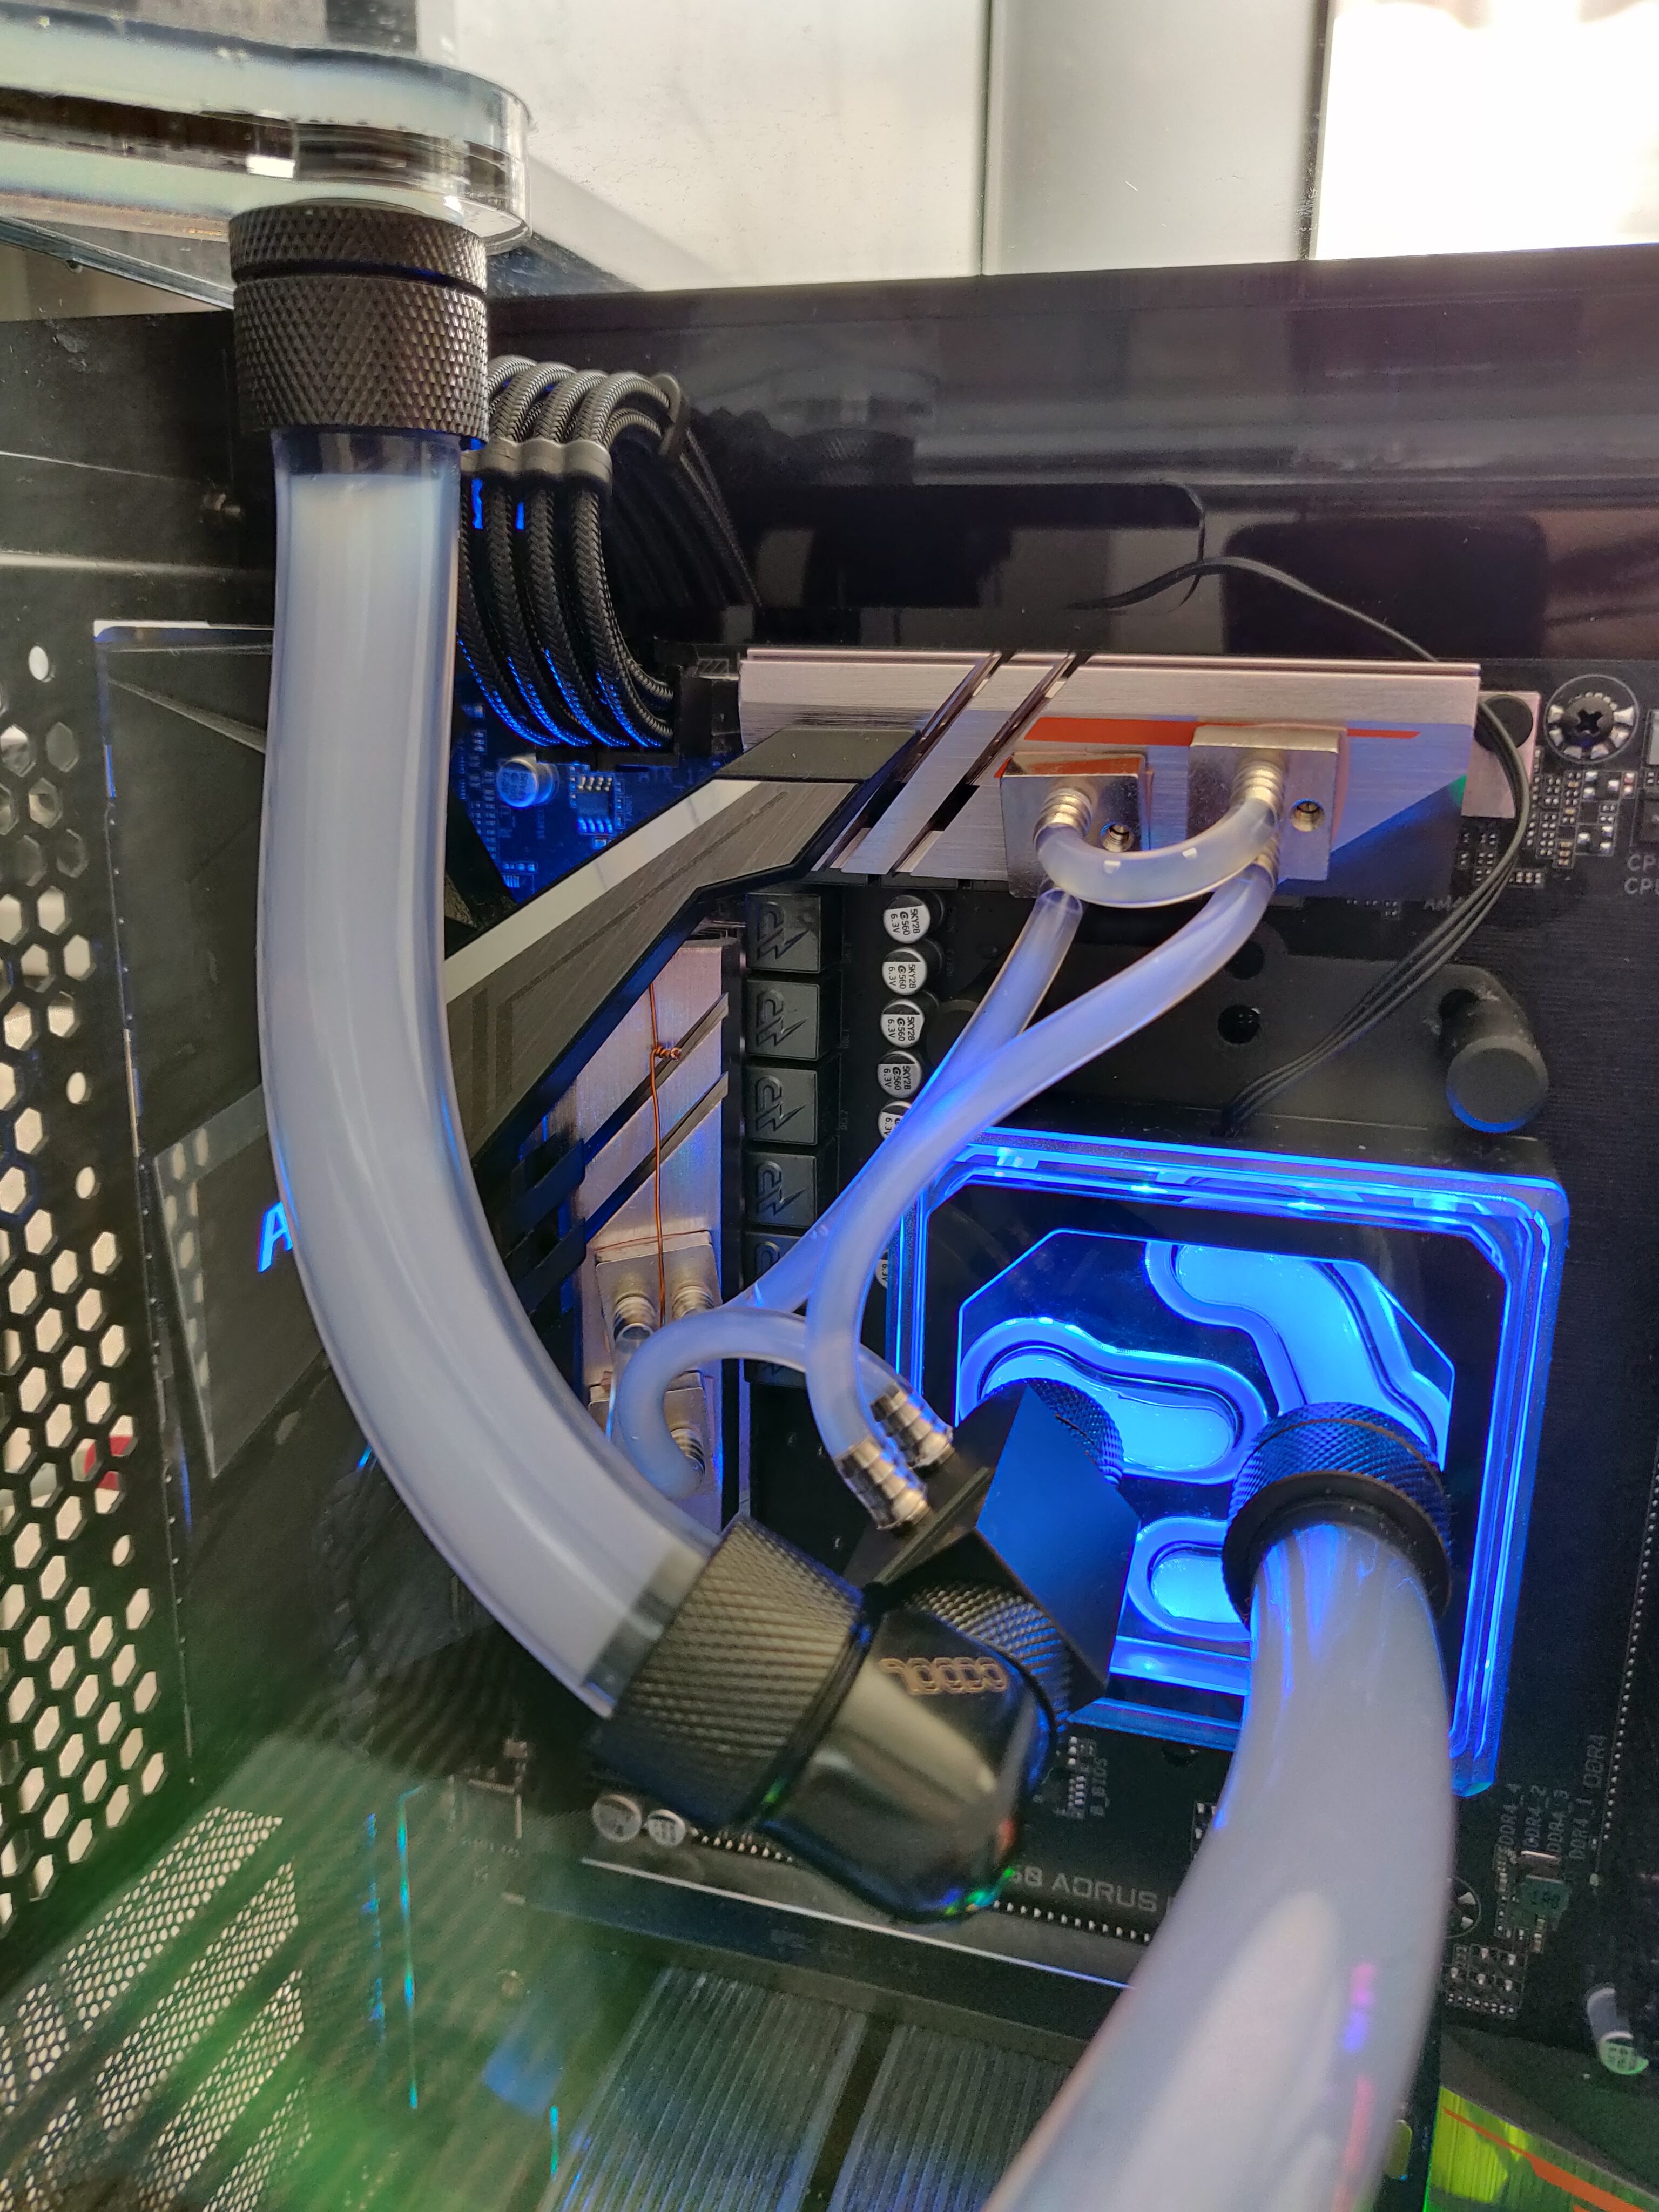
Next, I attached the adapter before the CPU cooling block inlet, where it would act as a splitter: Most of the coolant would continue directly to the CPU block, while some of it flow through the small tubes and VRM cooling blocks first.
This was a relatively simple addition, but after testing and refilling the loop, it reduced the VRM temperatures significantly, down to a very comfortable 40-50°C under full load. Also, in my opinion, the extra liquid cooling components look great too.
Coolant Channel Failure
After the new case had already been in use and working nicely for multiple months, on one night in August 2022, I noticed that the LED edge lighting of the front and left acrylic panels started to misbehave, flickering seemingly at random.
I thought it might have been a bad connection, but once I reached down and touched the shelf below the case, I realised that it was the nightmare of every liquid cooled PC builder: The cooling loop had leaked, spilling coolant into the bottom of the case and onto the LEDs, causing their erratic behaviour.
Of course, I immediately shut the system down and disconnected it from power, before starting to clean it up and investigate where this leak had come from.
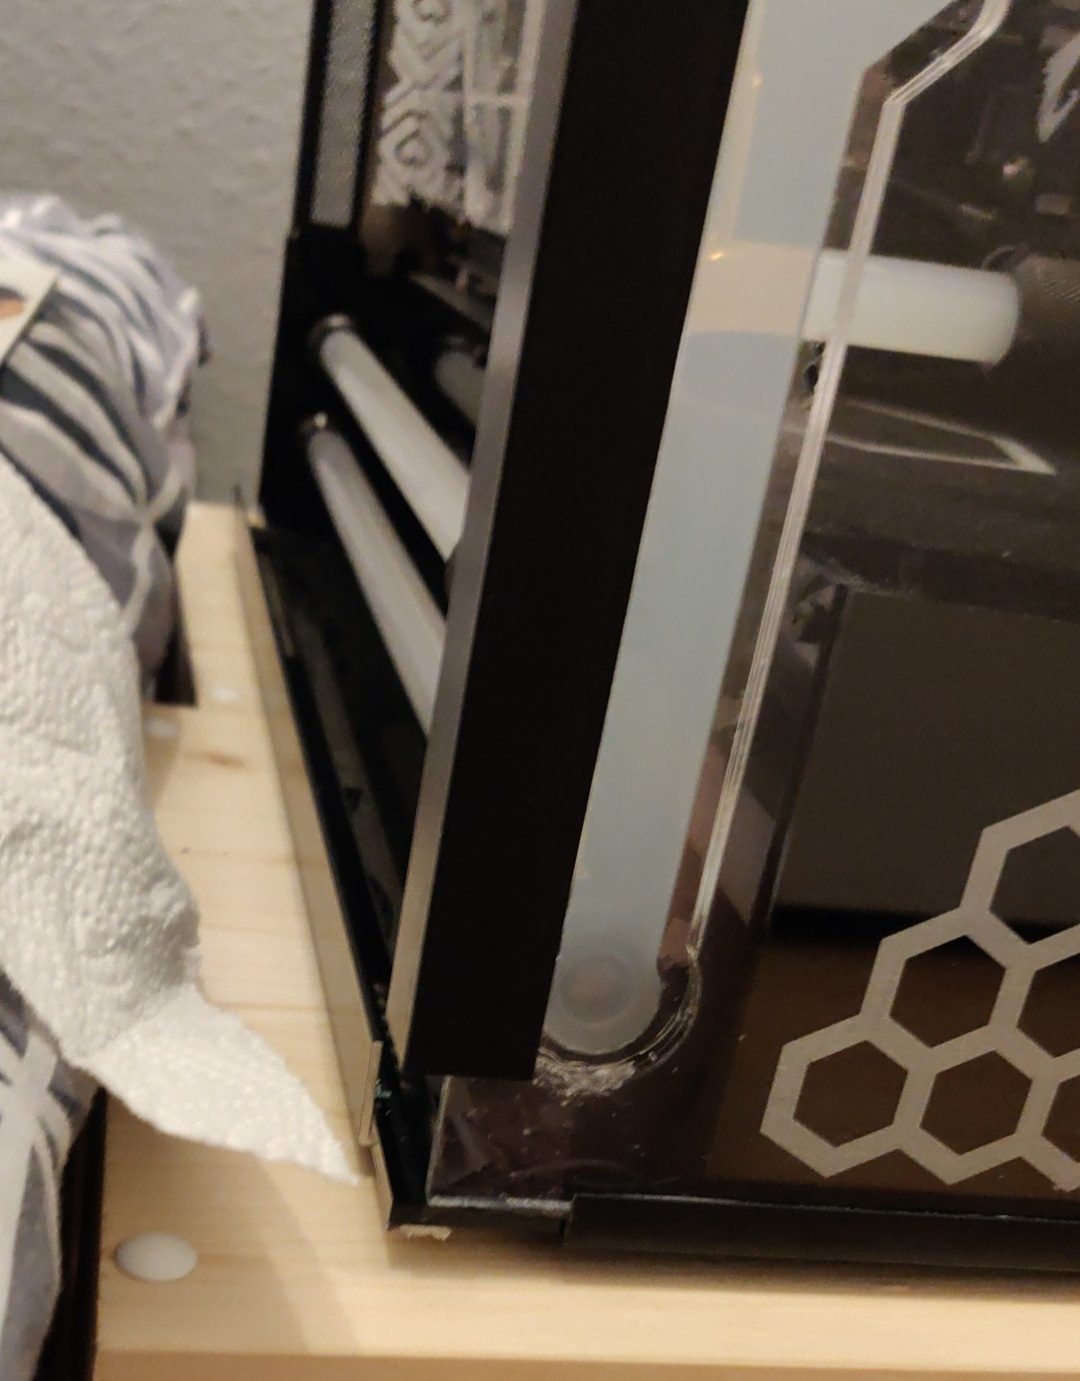
I was quickly able to identify the source of the leak – it was a small pinhole in the front coolant channel, at one of the DCM-fused joints between acrylic layers.
I wasn’t sure what to do about it at the moment, so I covered the area in lots of transparent epoxy, hoping it would be a one-time thing.
Well, it wasn’t. The patched loop did hold quite well for a few more months, but over time, more pinhole leaks started forming in both coolant channels, at an increasing rate too.
Therefore, as much as I hated to admit it, I knew that the integrated coolant channels could no longer be trusted.
I implemented a temporary solution using a soft tube to bypass the coolant channels, while considering what to do as a permanent fix. In the end, I decided to try my luck at bending a long hard tube to replace the channels.
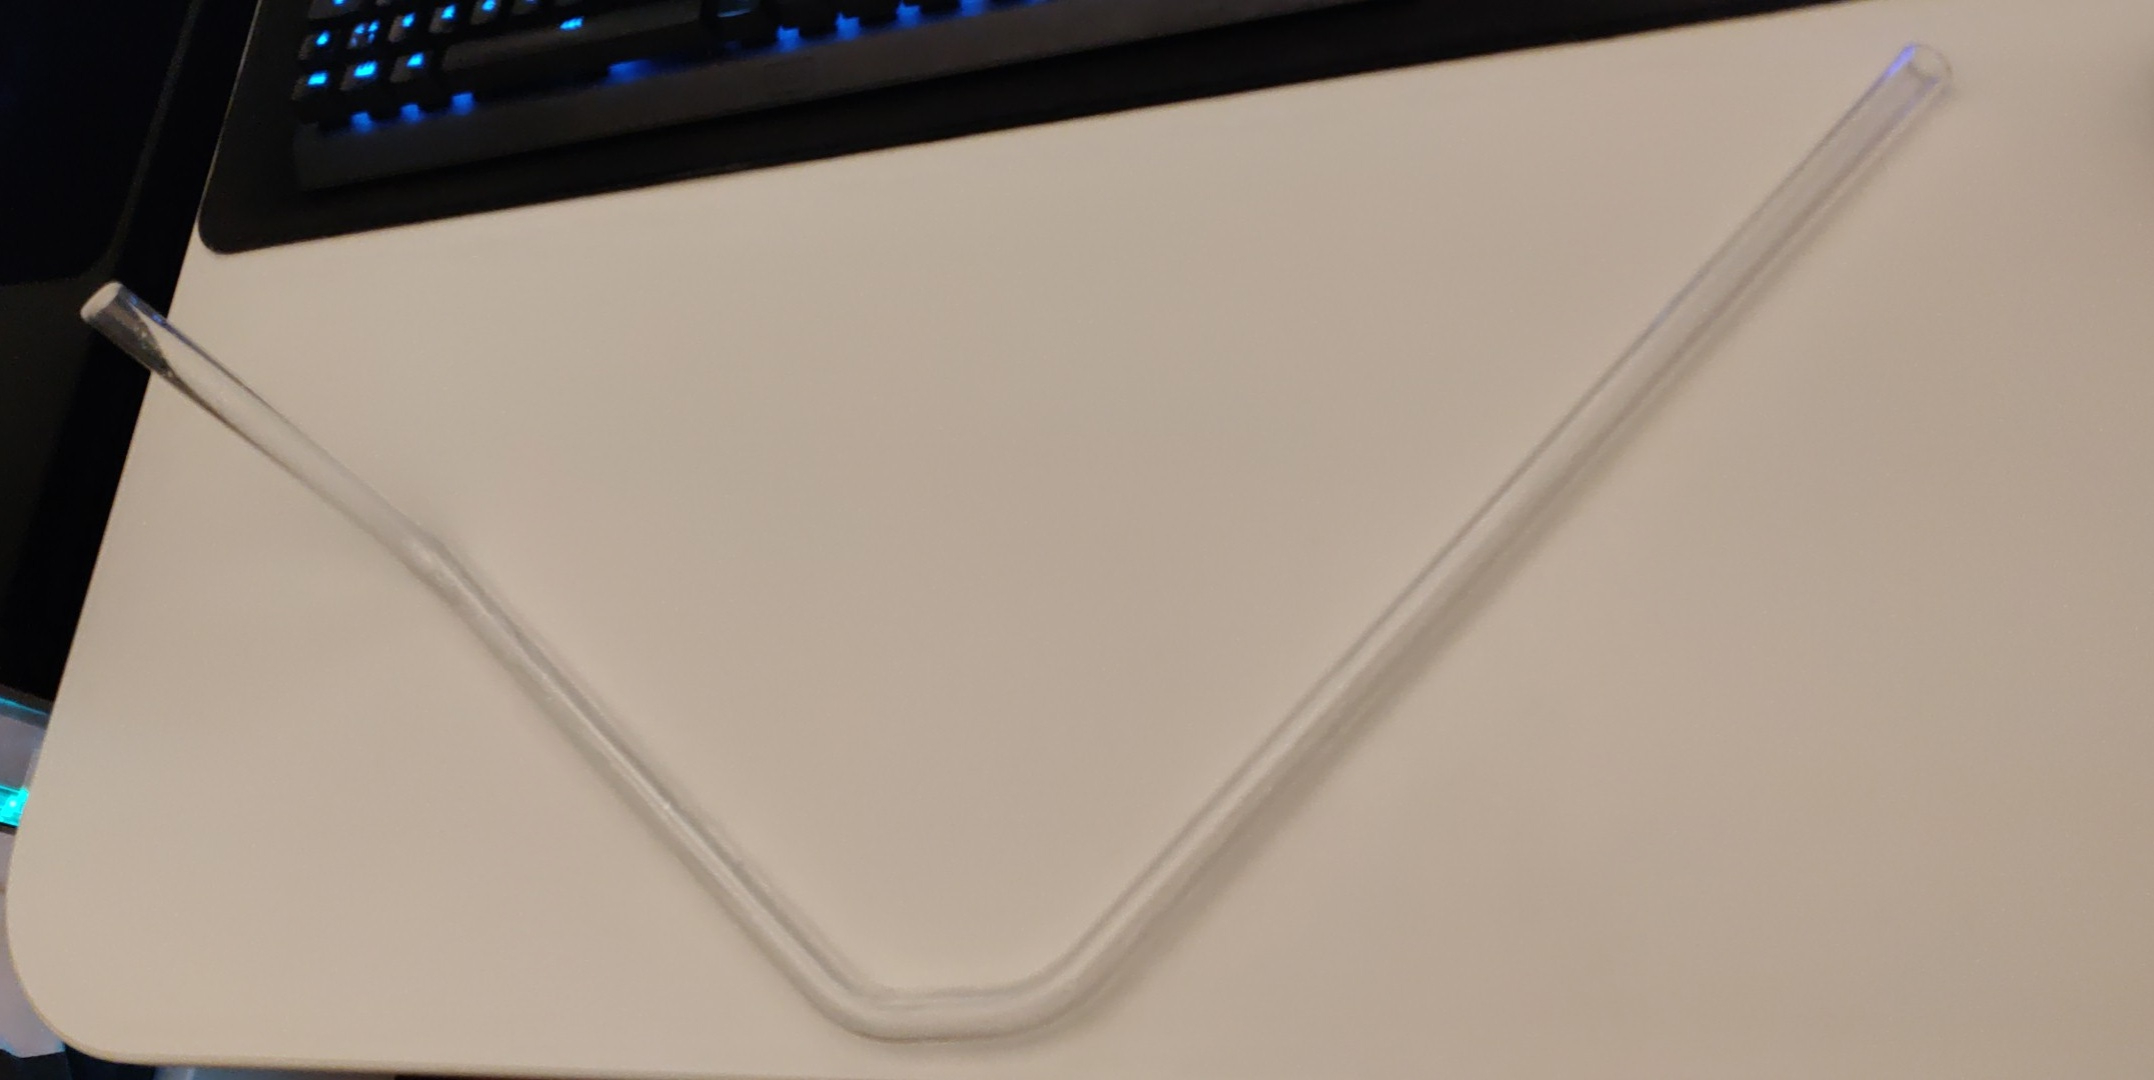
Therefore, I bought a heat gun, a bending helper tool, and a silicone insert (to prevent the tube from buckling during bending), and after a little bit of practice on scrap pieces, I was able to bend a long acrylic tube into the shape I wanted!
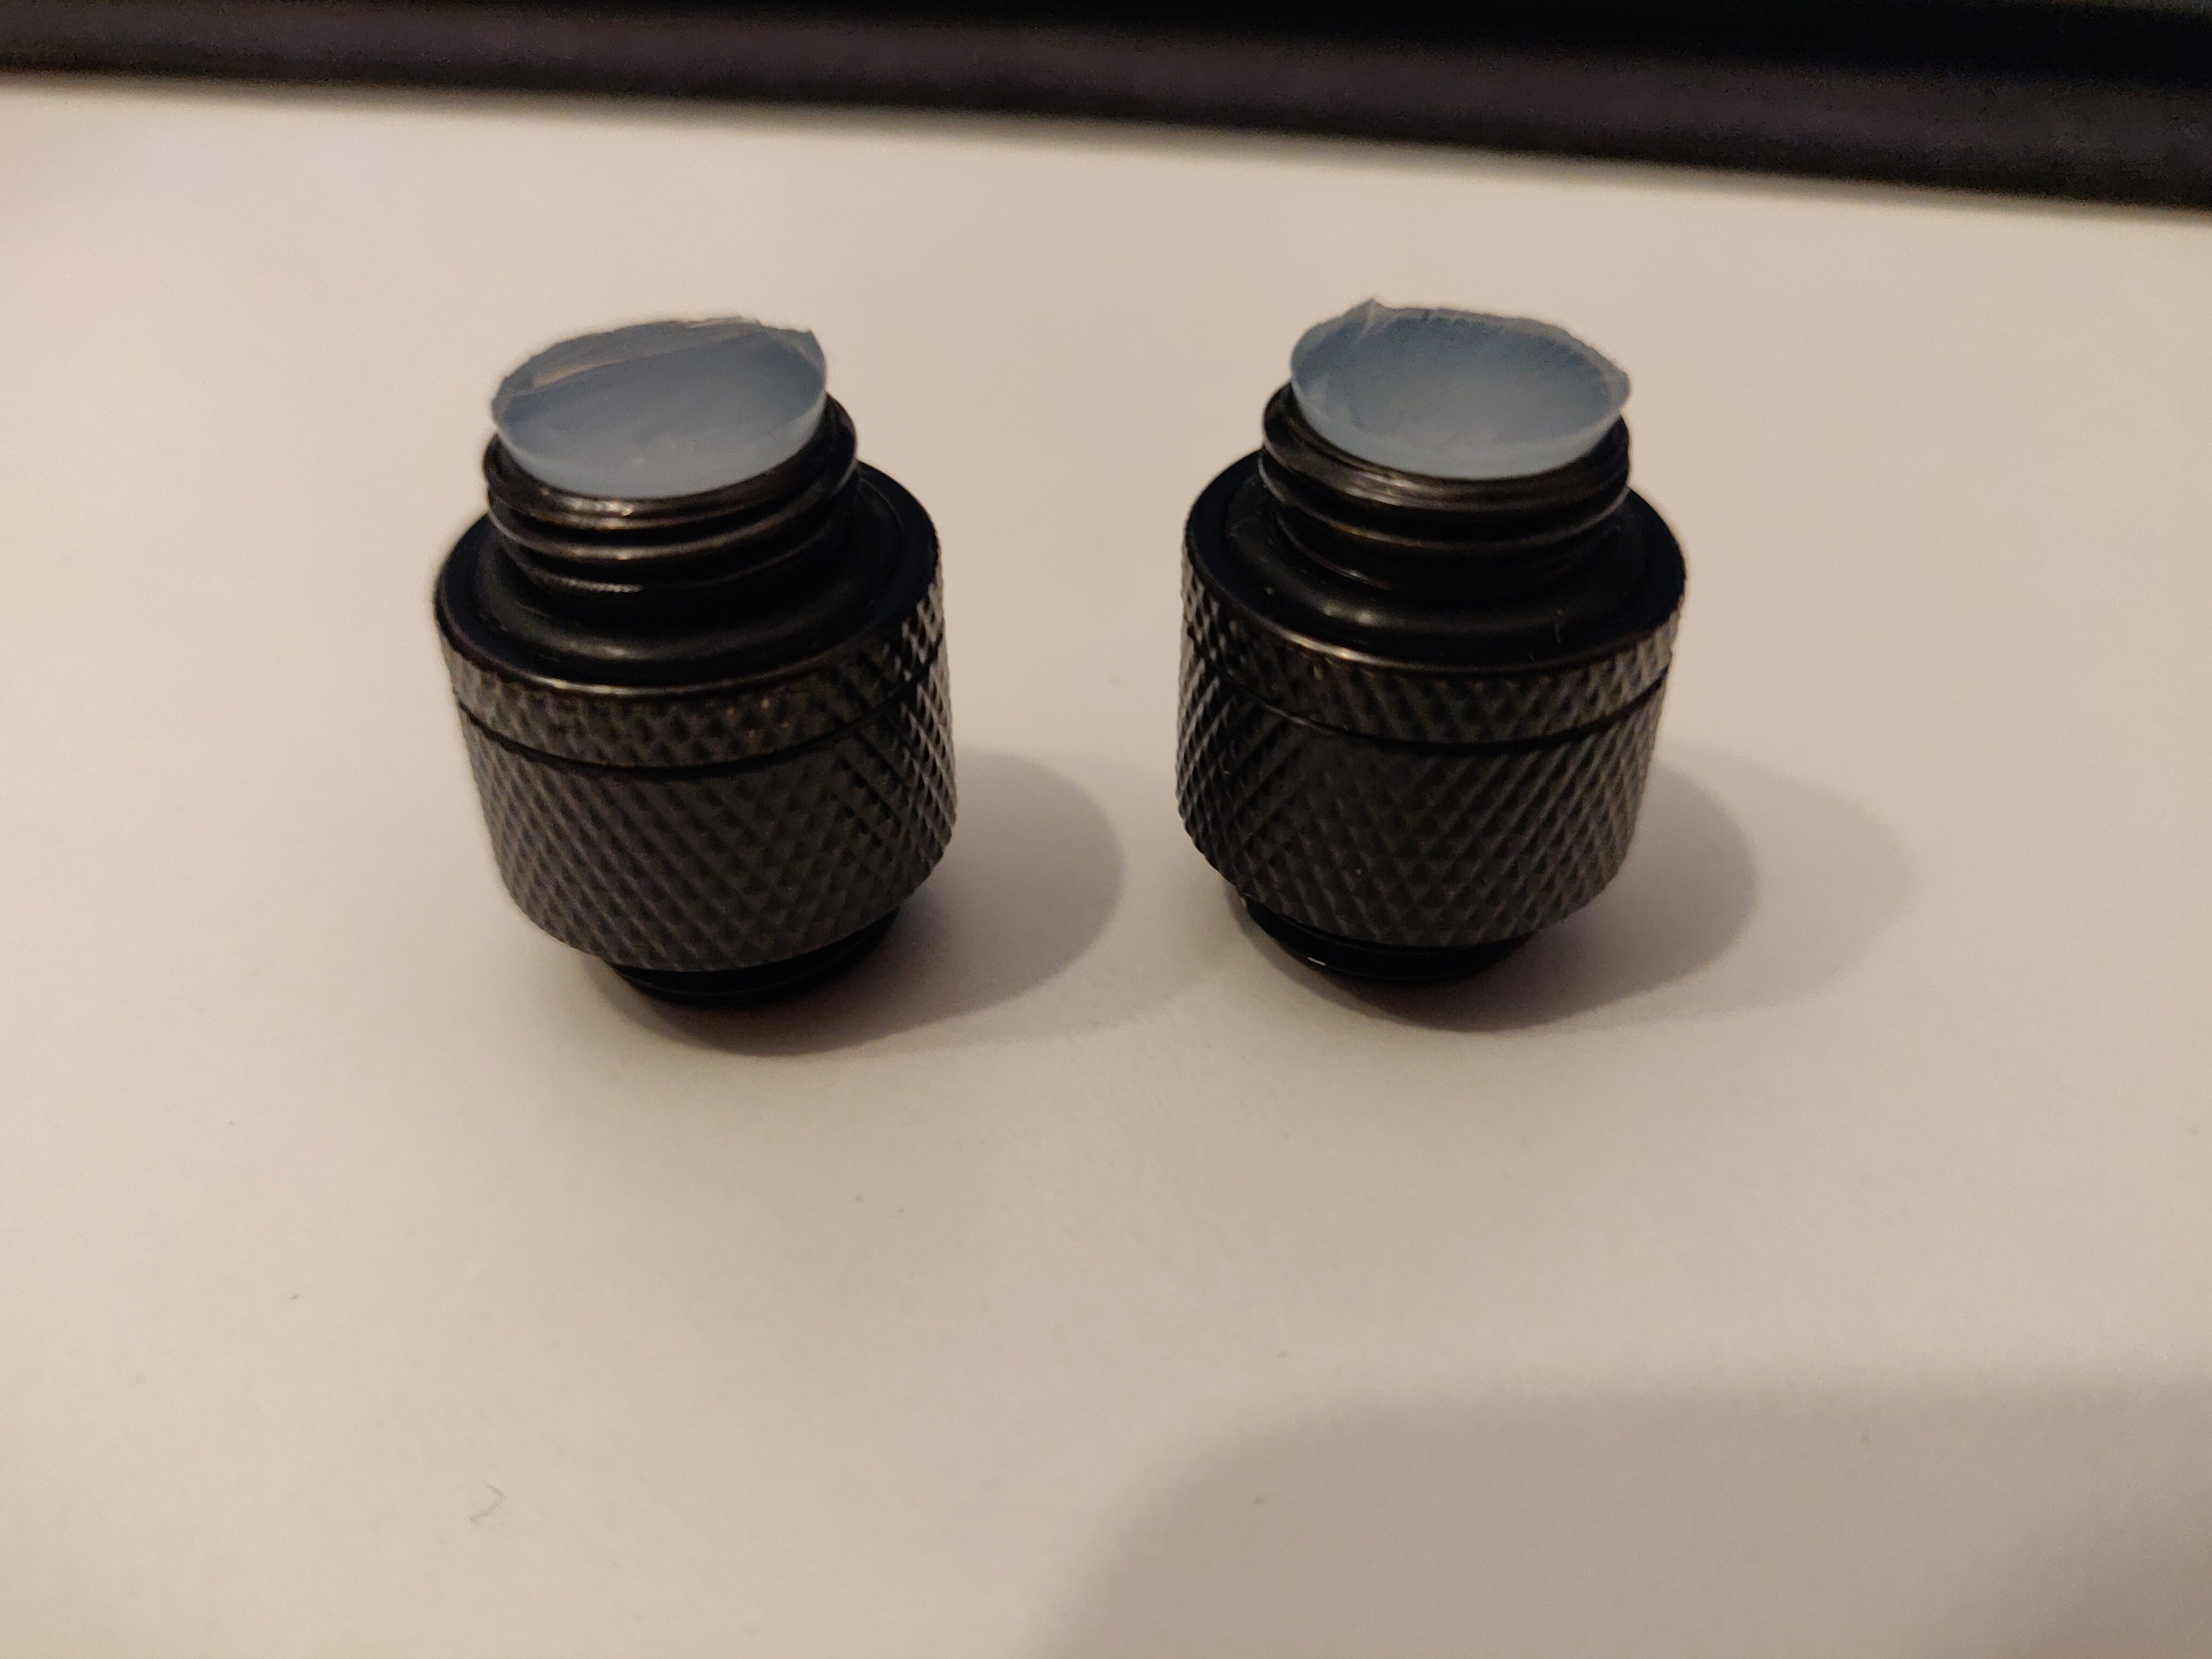
I bought some multi-port fittings to mount the tube and incorporate it into the system, using rotatable fittings plugged with rubber to hold the new tube assembly in place on the coolant channels’ threaded holes.
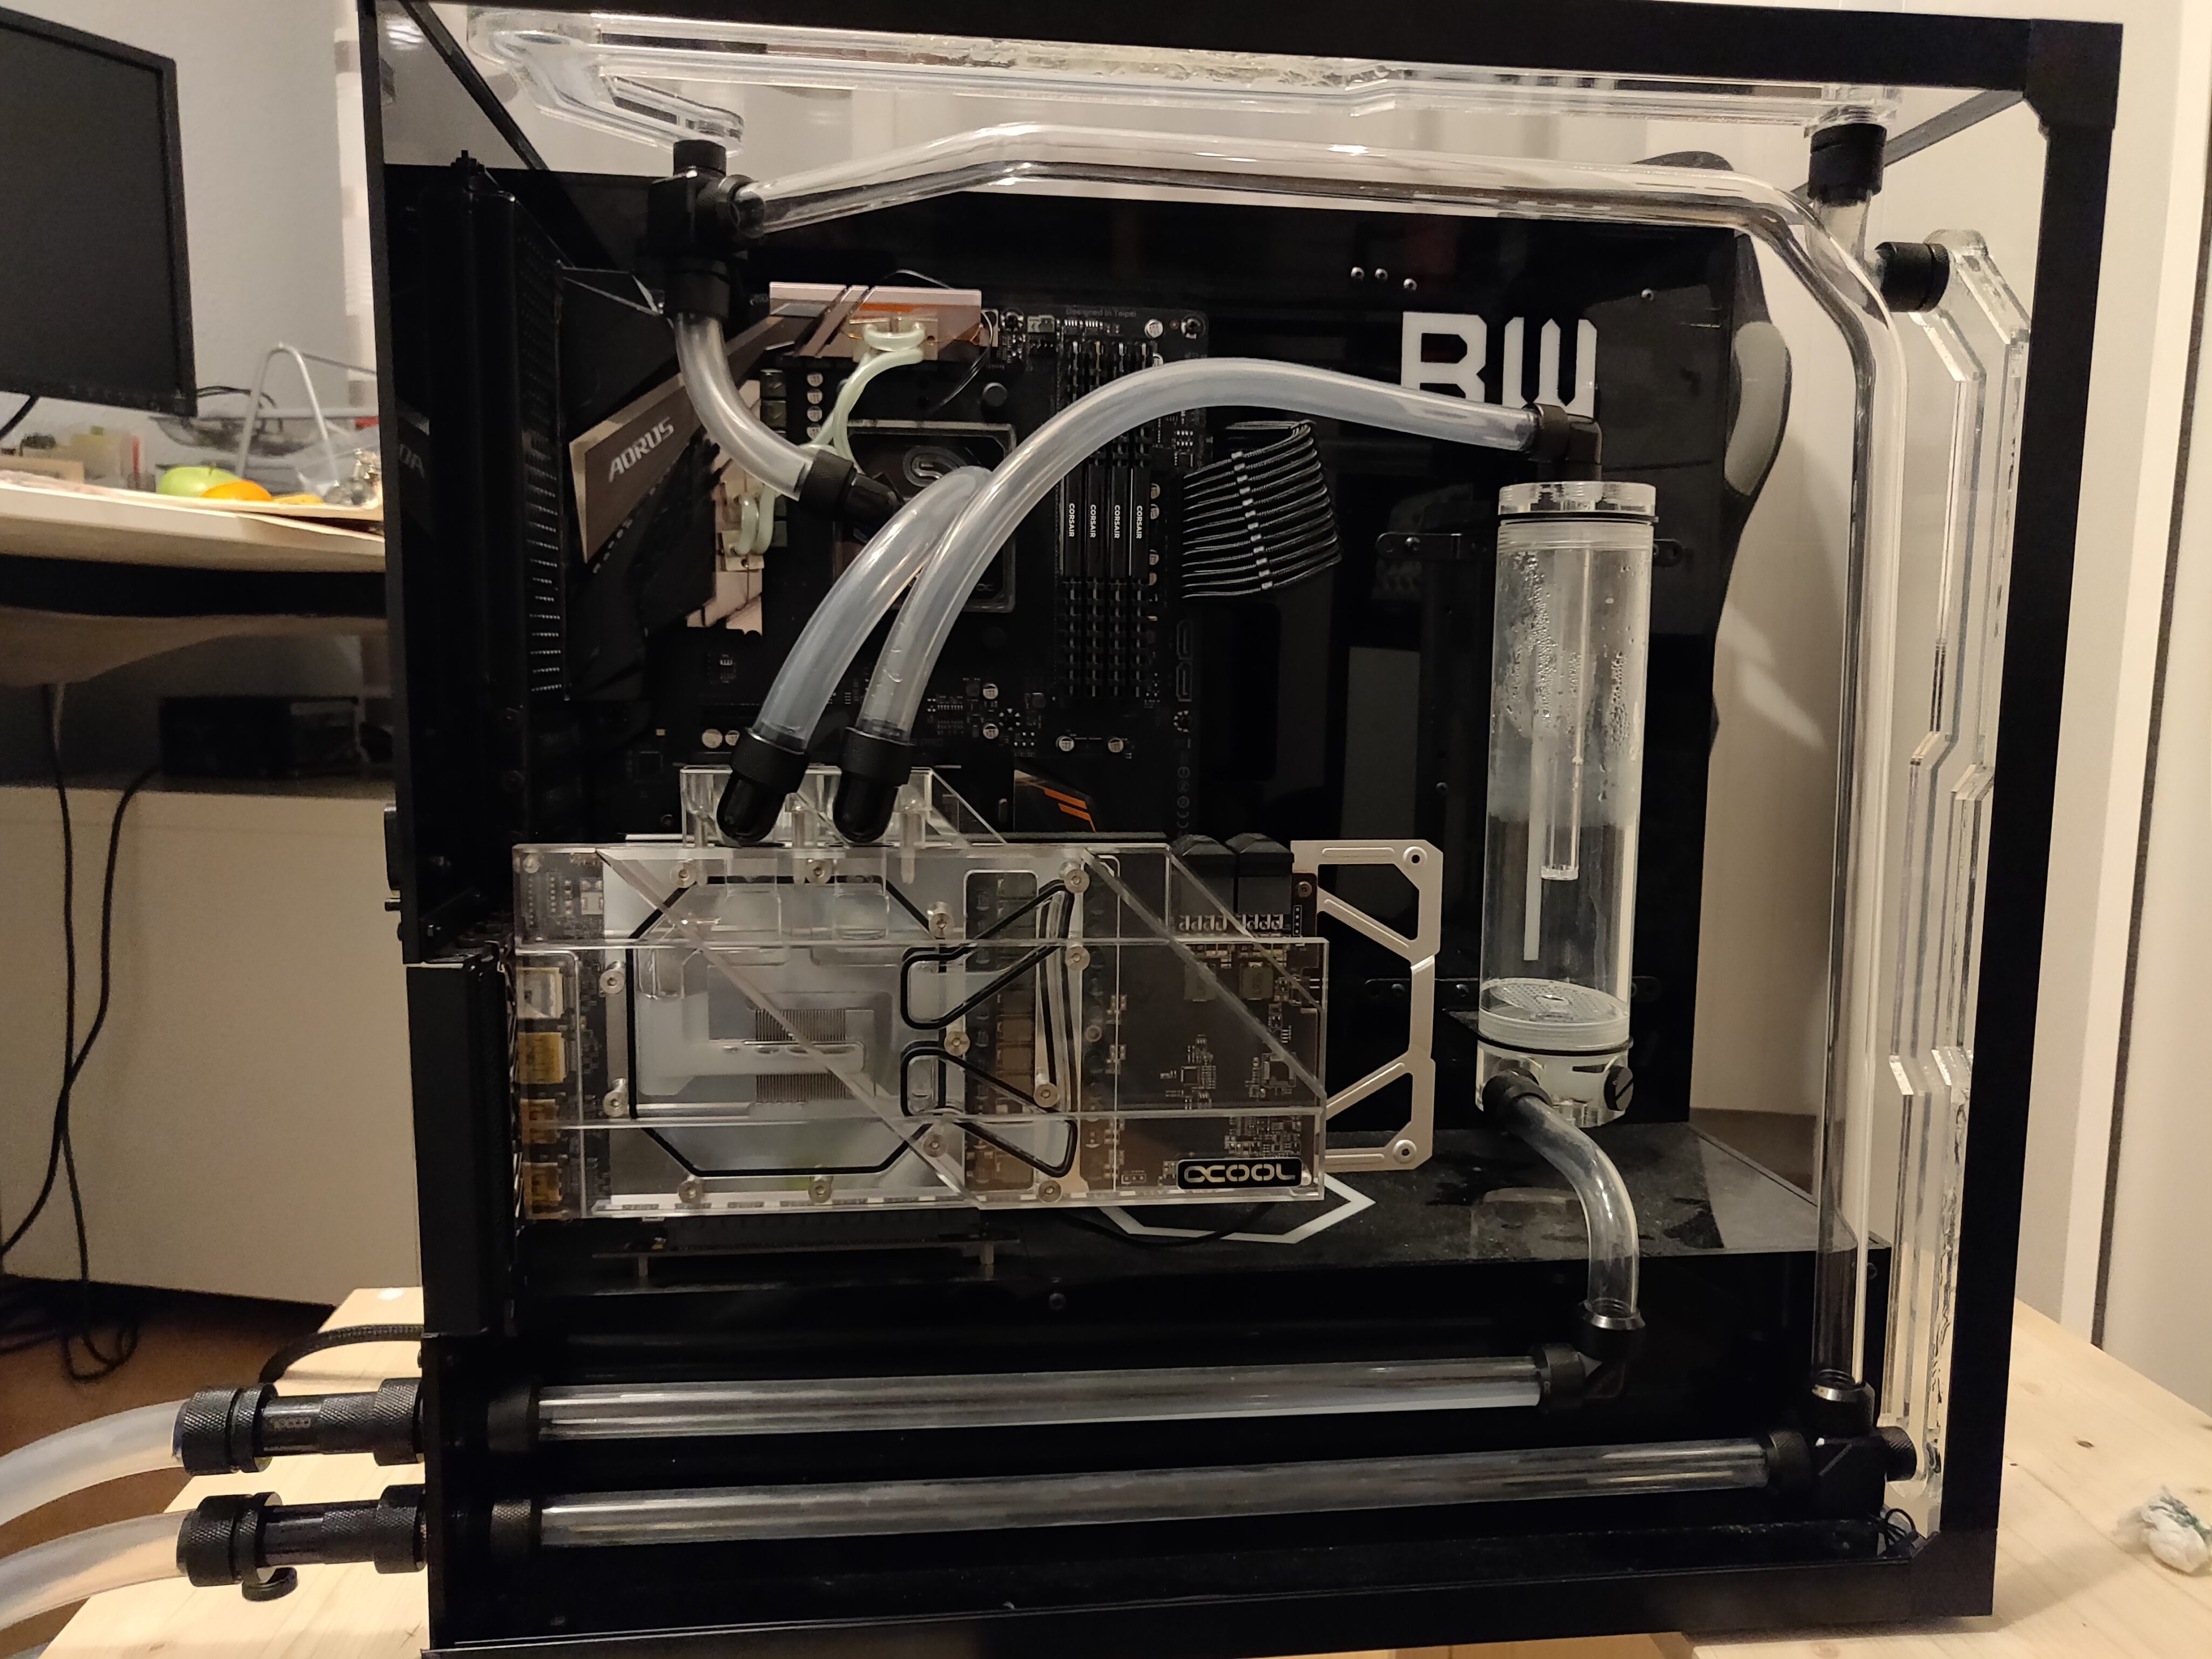
After a partial loop drain, I mounted the new tube in the case and refilled the loop. While it didn’t look perfect, due to the now empty and useless coolant channels, I think it still looked quite good given the circumstances, and I’m glad I chose that solution.
Gradual Upgrades
A few months after all the leak trouble, the system was working nicely, but I could feel the CPU becoming a bit weak for some intense workloads. The old hard drive I was using also showed some signs of ageing.
Aside from that, I wasn’t a big fan of the pump I bought – it wasn’t as quiet as I had hoped, and it struggled with the relatively large flow resistance of my loop (likely caused by its size and large number of fittings).
Therefore, I decided to upgrade the system in two ways – upgrading the PC itself, with a new motherboard, processor (i5 13600K), memory (32GB of DDR5), and storage (NVMe SSDs); as well as buying a new pump, a Laing DDC 4.2 PWM.
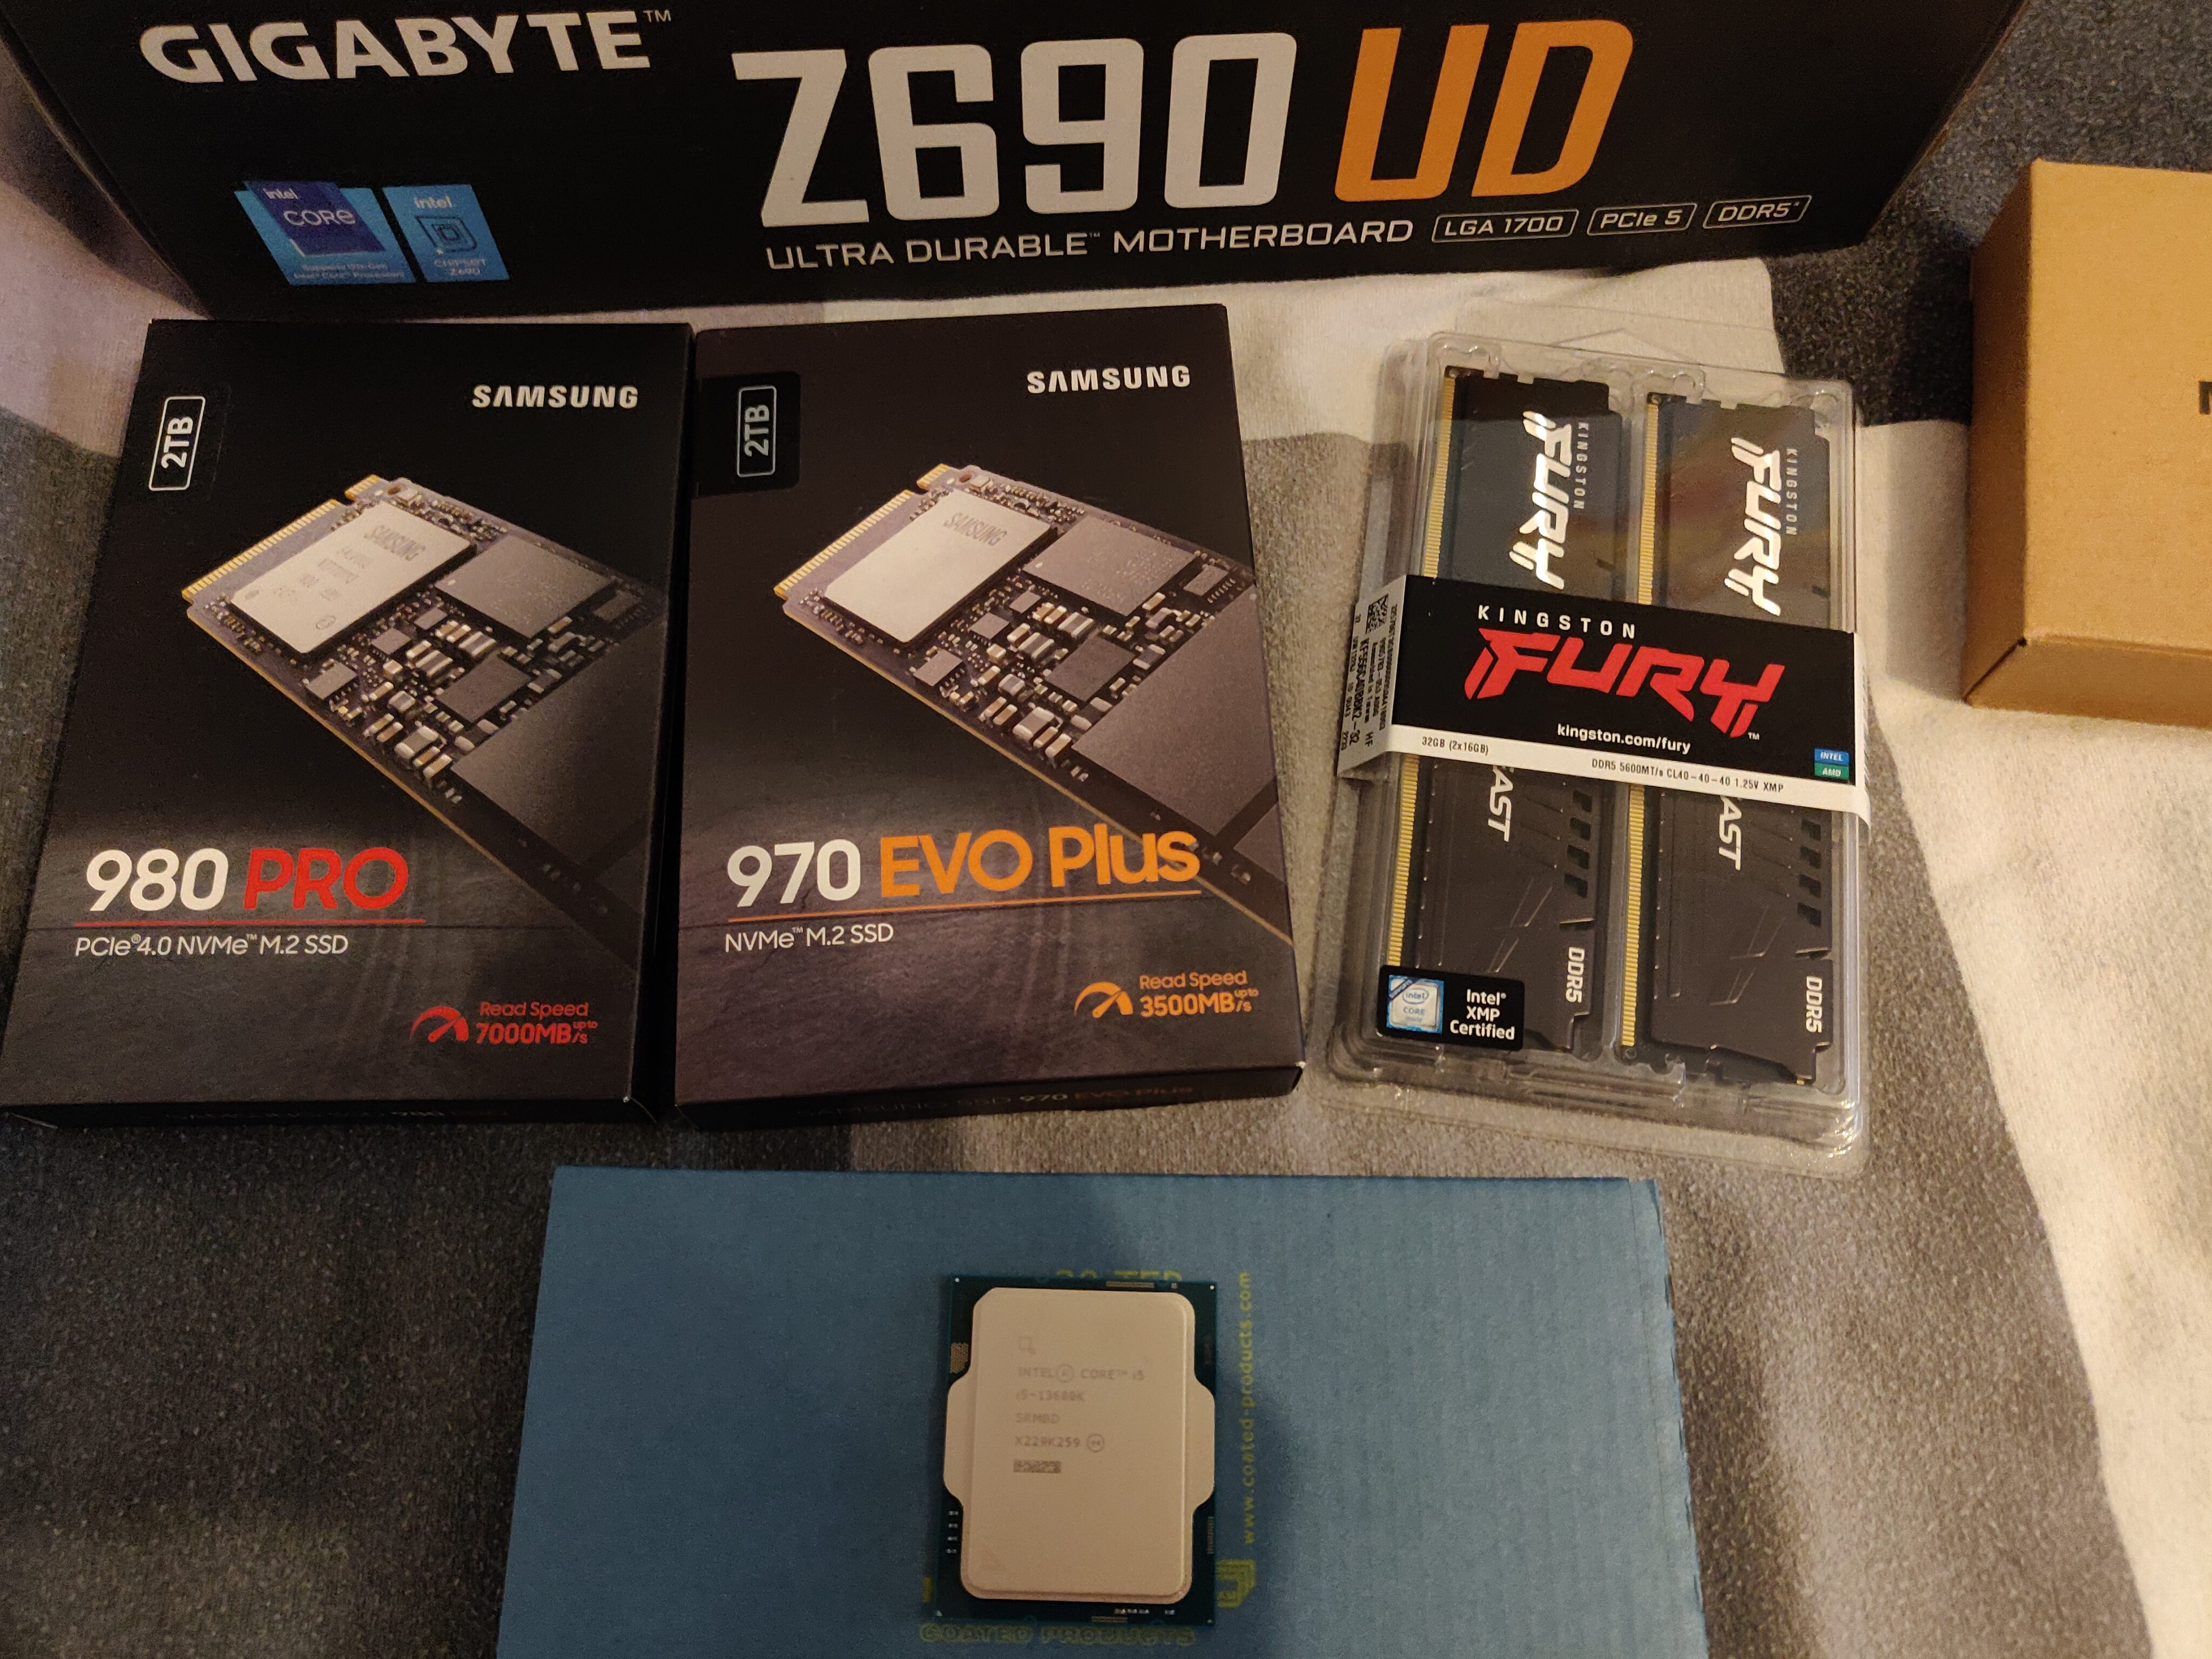
I drained the loop completely and removed the old motherboard, before transferring the CPU and VRM cooling blocks to the new board. Afterwards, I installed it back into the case, replaced the pump with the new one (which was quite simple), tested the loop, and filled it again.
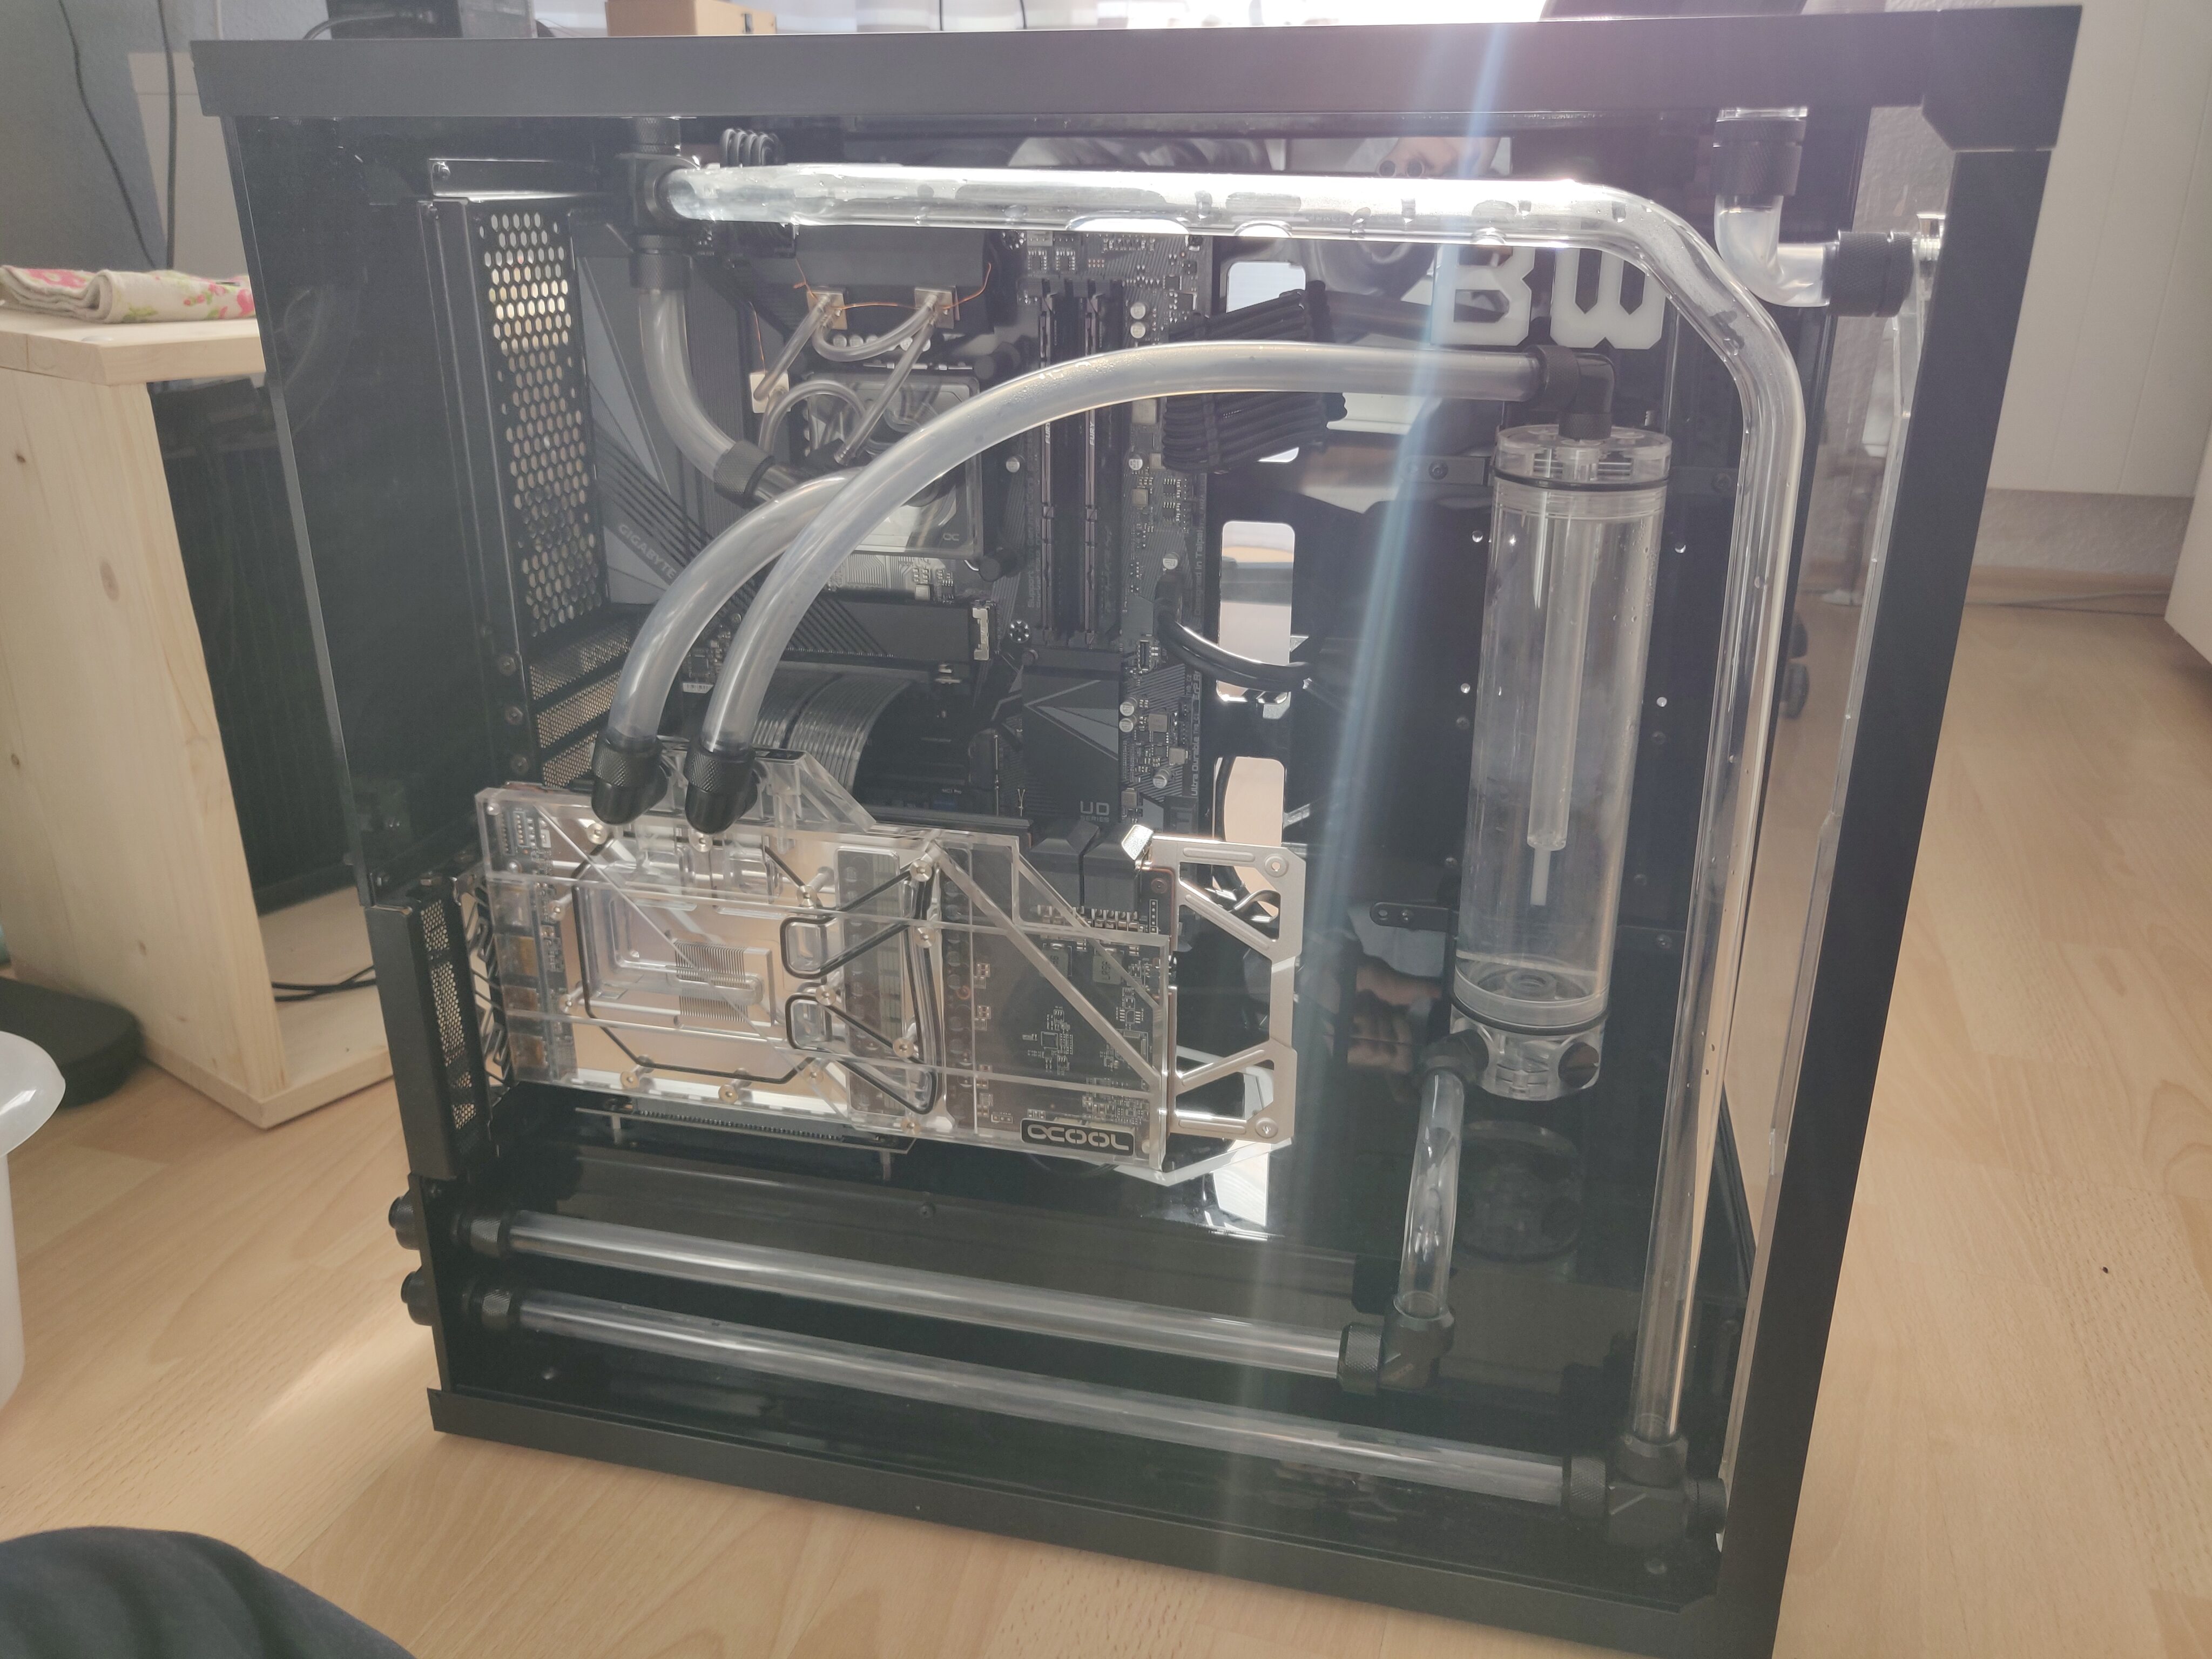
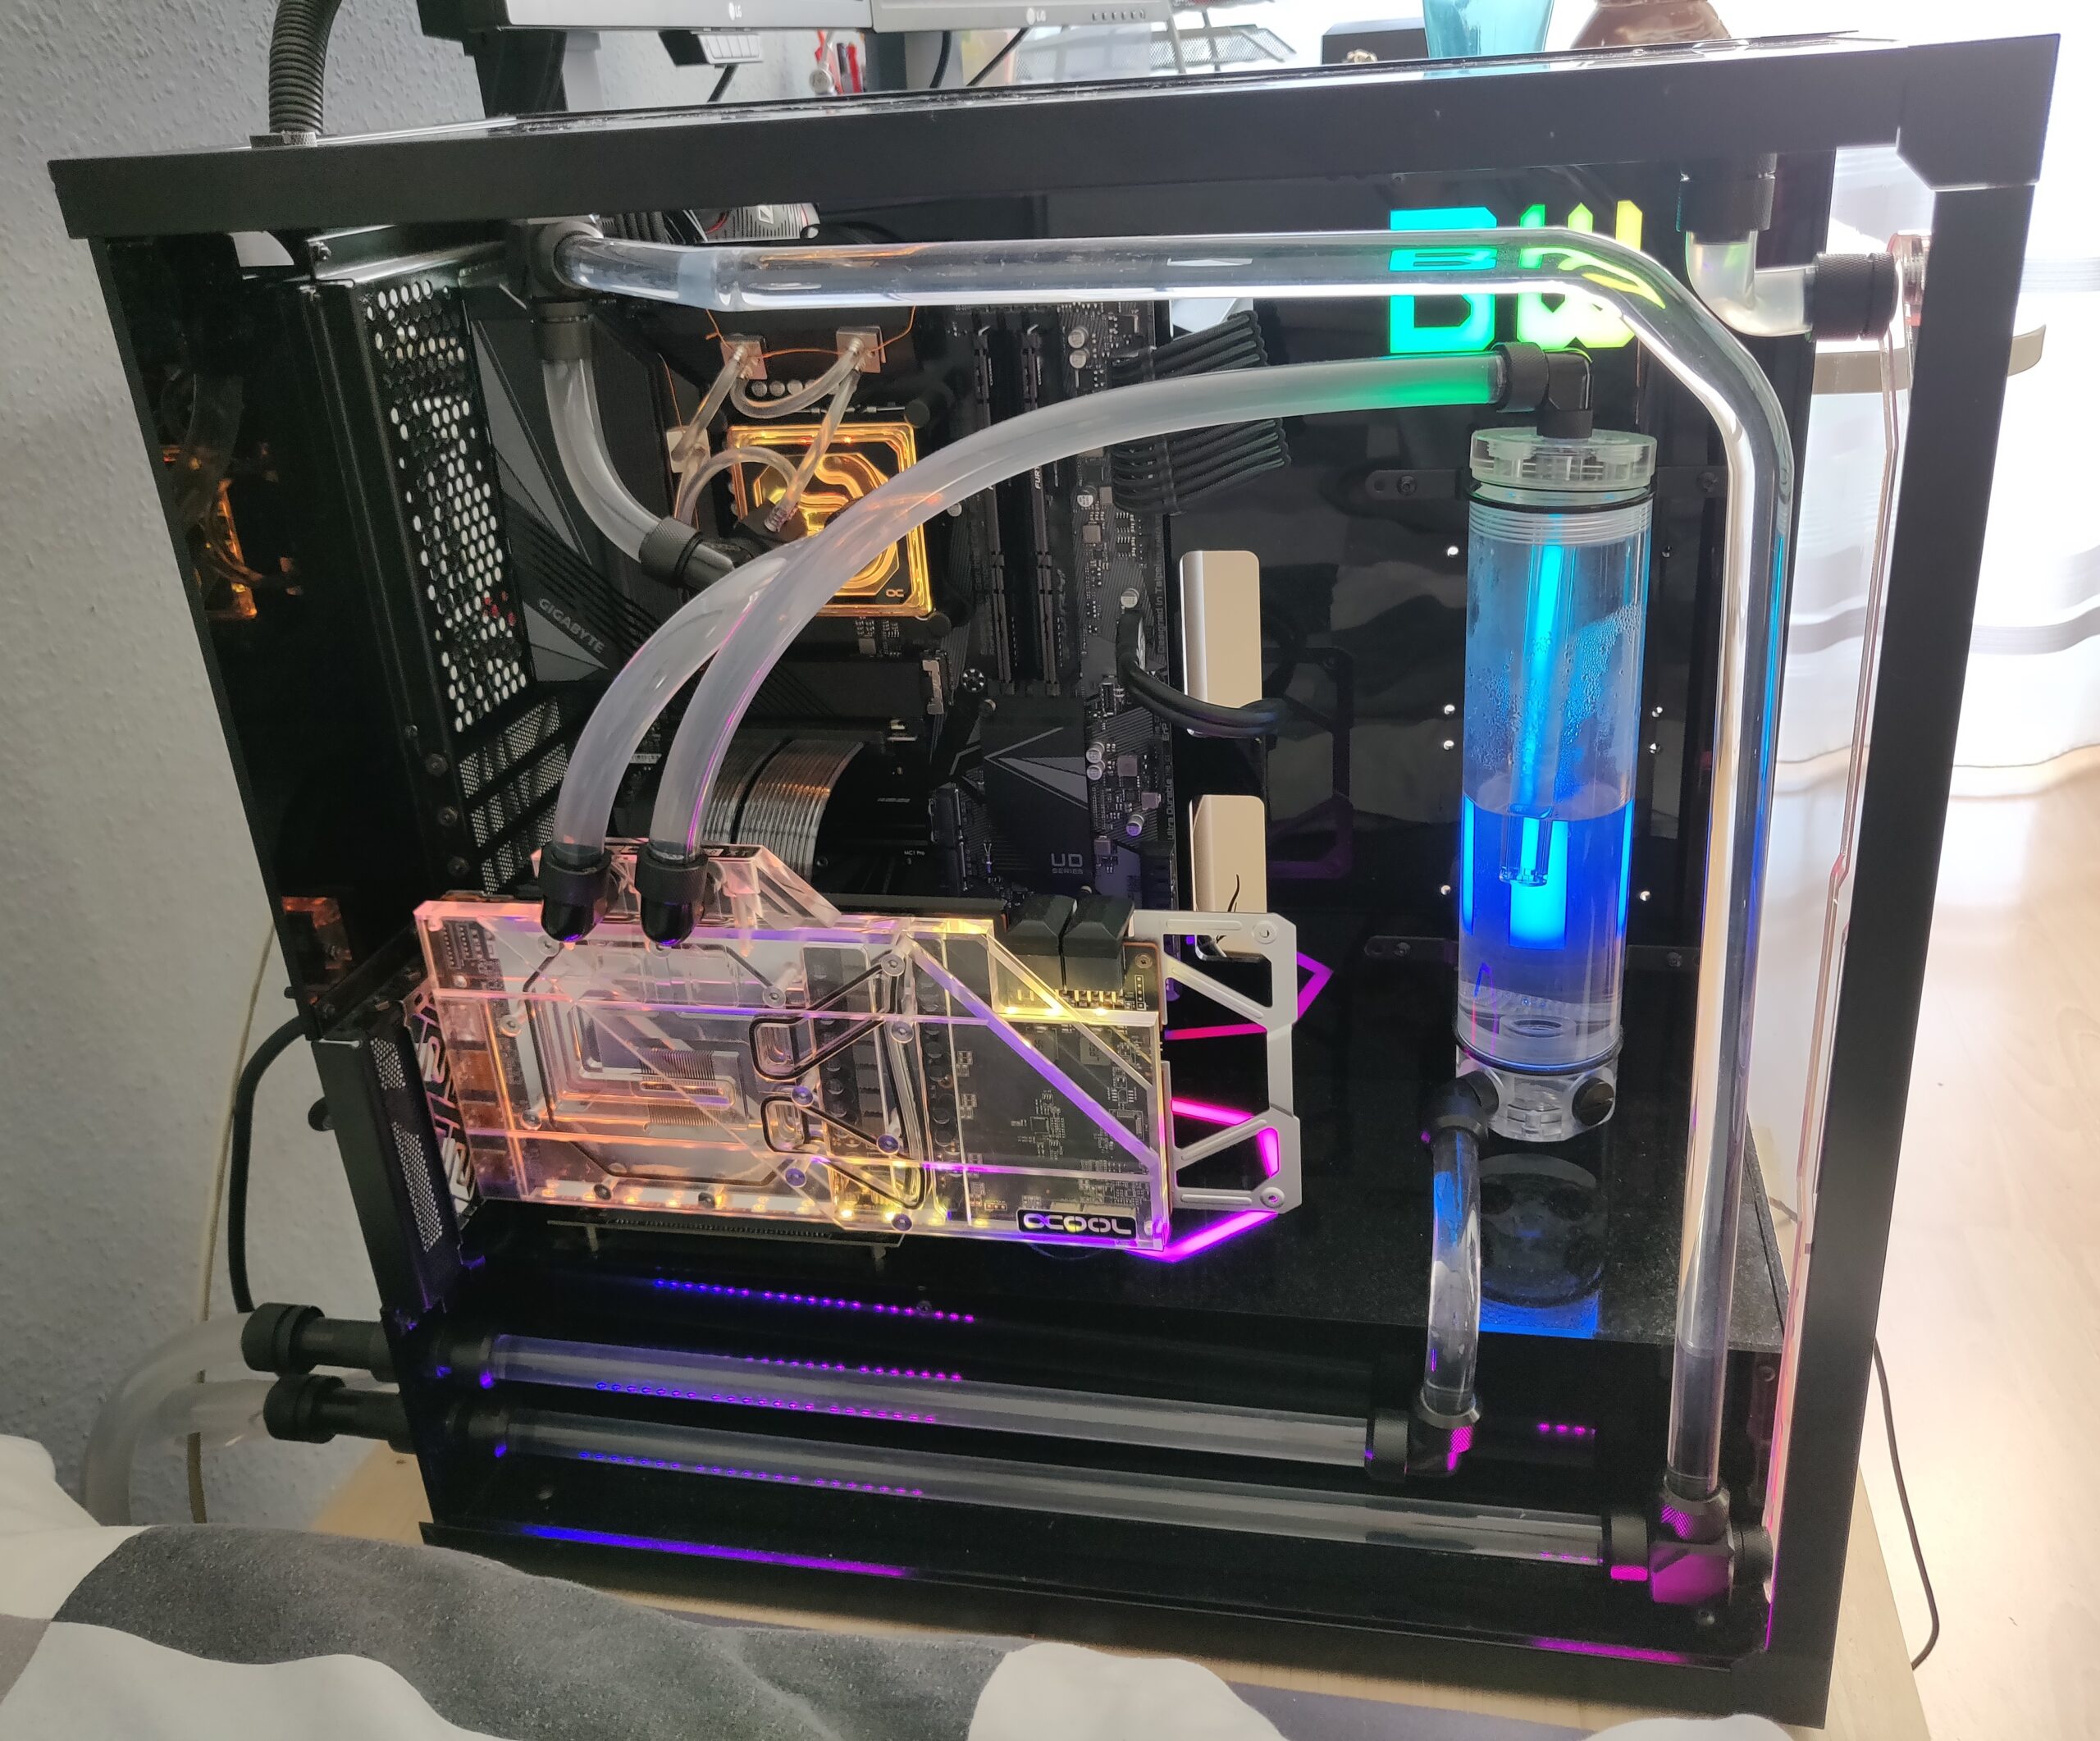
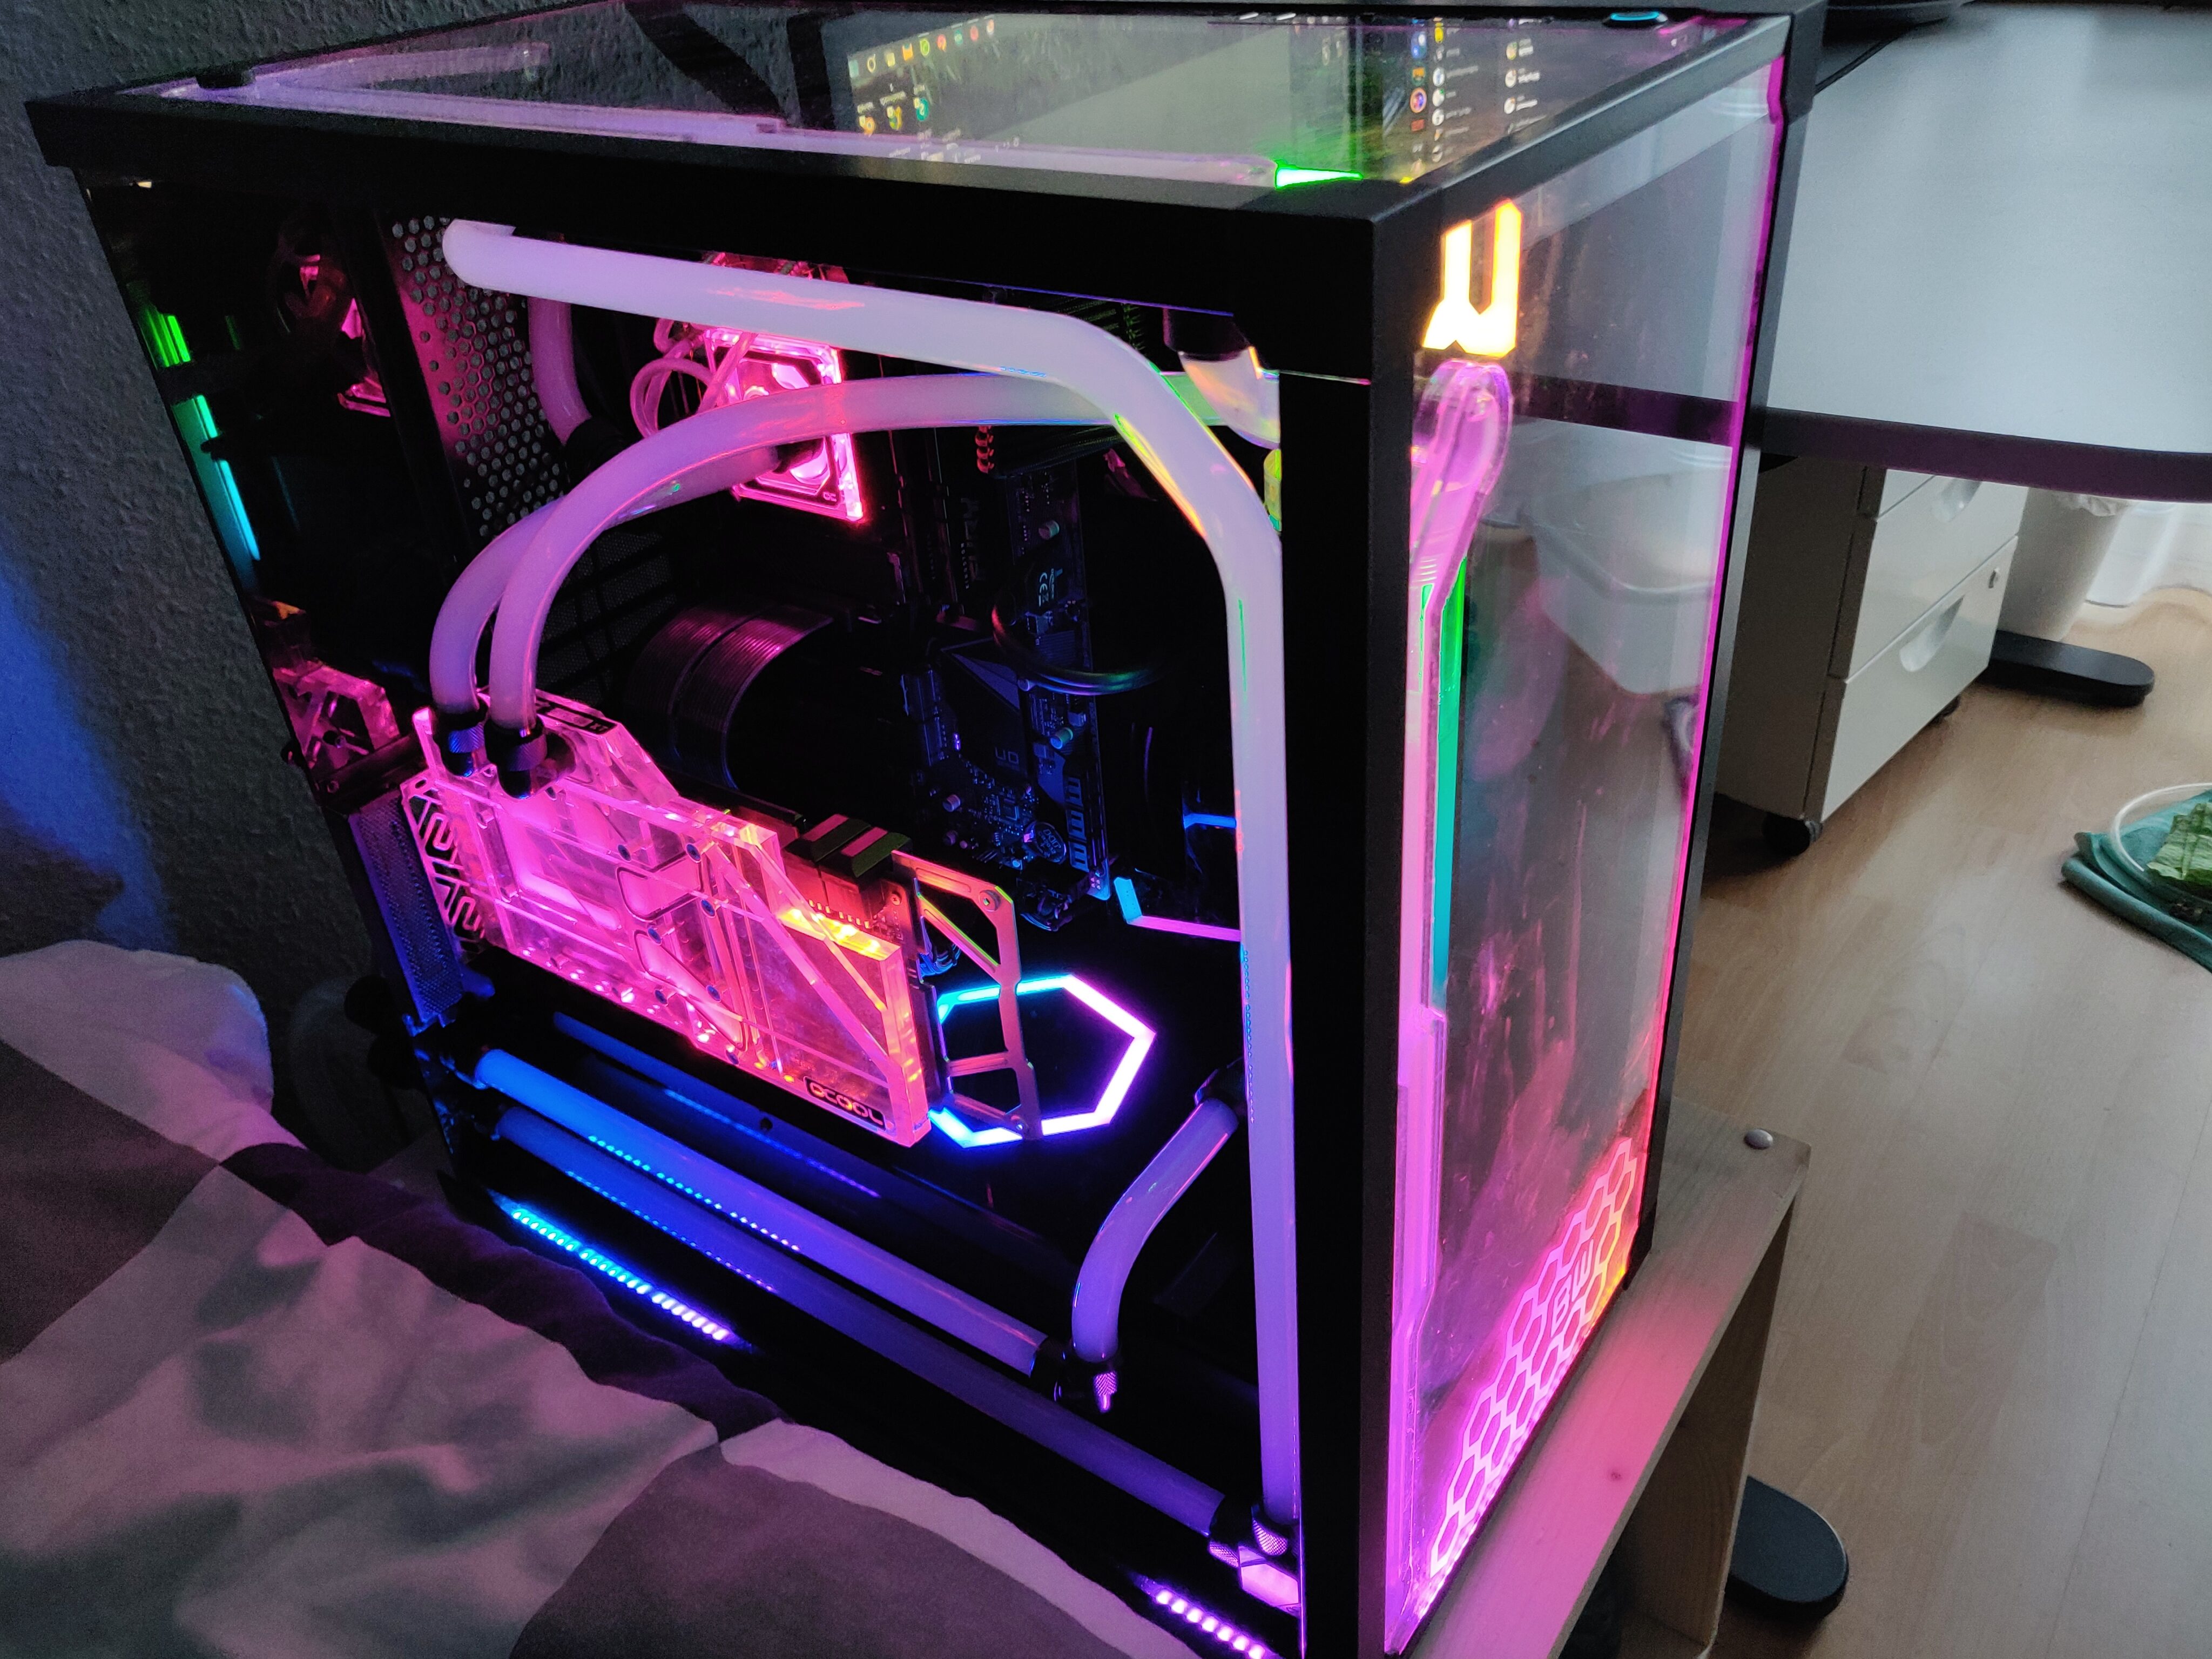
Annoyingly, the new motherboard I bought had some issues, so I had to replace it with a different model after a few weeks – requiring me to repeat a lot of this work.
However, even after that, one problem remained: The CPU cooling block didn’t perform well on the new CPU. It seemed that the shape of its cold plate just didn’t fit the processor’s shape very well, leading to bad thermal contact – which was annoying, but not critically bad.
Another year and a half passed with the system working fine, until mid 2024, when I noticed the new pump having some trouble starting up. After draining the system and checking it out, I found the cause to be a deposit of small particles that settled out of the semi-opaque coolant.
Therefore, I decided that it was time for one more upgrade: I emptied the loop and cleaned the entire system thoroughly (disassembling everything I could), got the pump cleaned and running nicely again, and bought a new CPU cooling block (Alphacool’s Core 1 LT).
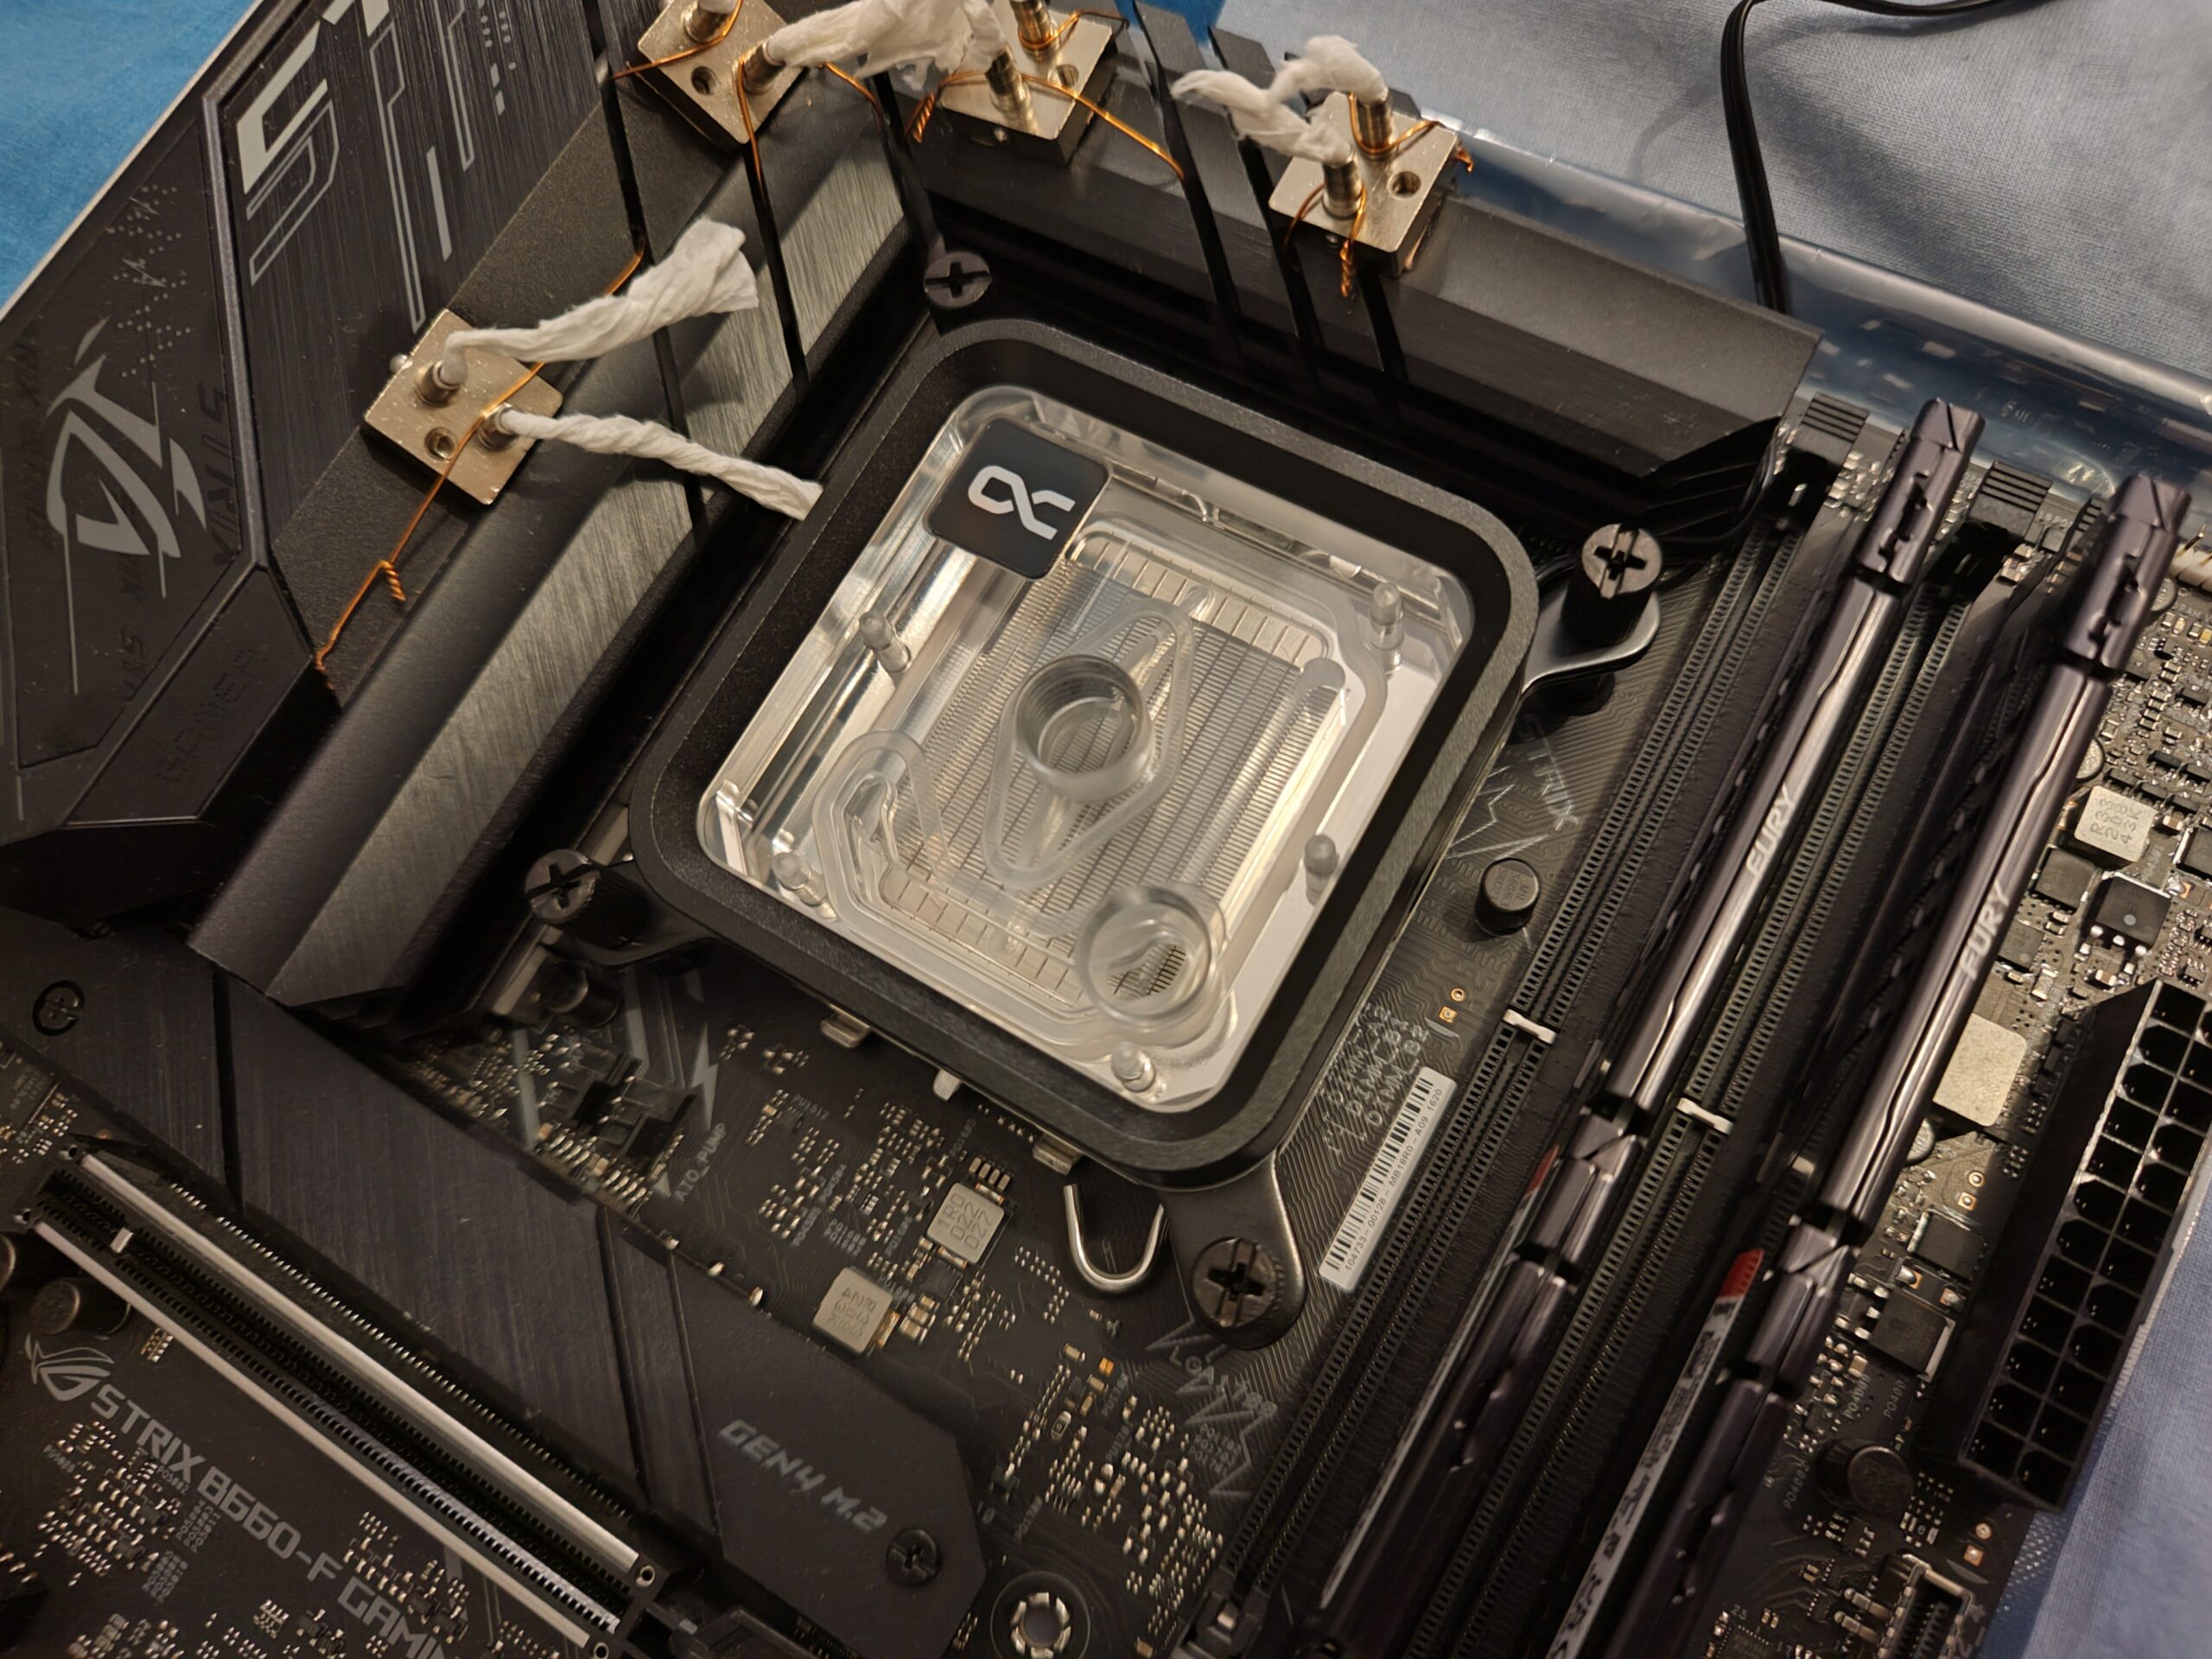
The reassembly and testing process was similar to before – I just added some more quick-disconnects for easier pump maintenance in the future, put everything back together, tested it for leaks, and refilled it with coolant.
However, this time, I decided that I had had enough of the Mystic Fog coolant, and didn’t want a repeat of the pump getting clogged. Also, due to EKWB’s corporate trouble around that time, I really didn’t want to buy more of it. So I opted for pure distilled water this time, with some anti-corrosion and biocide additives to keep the loop safe and clean.
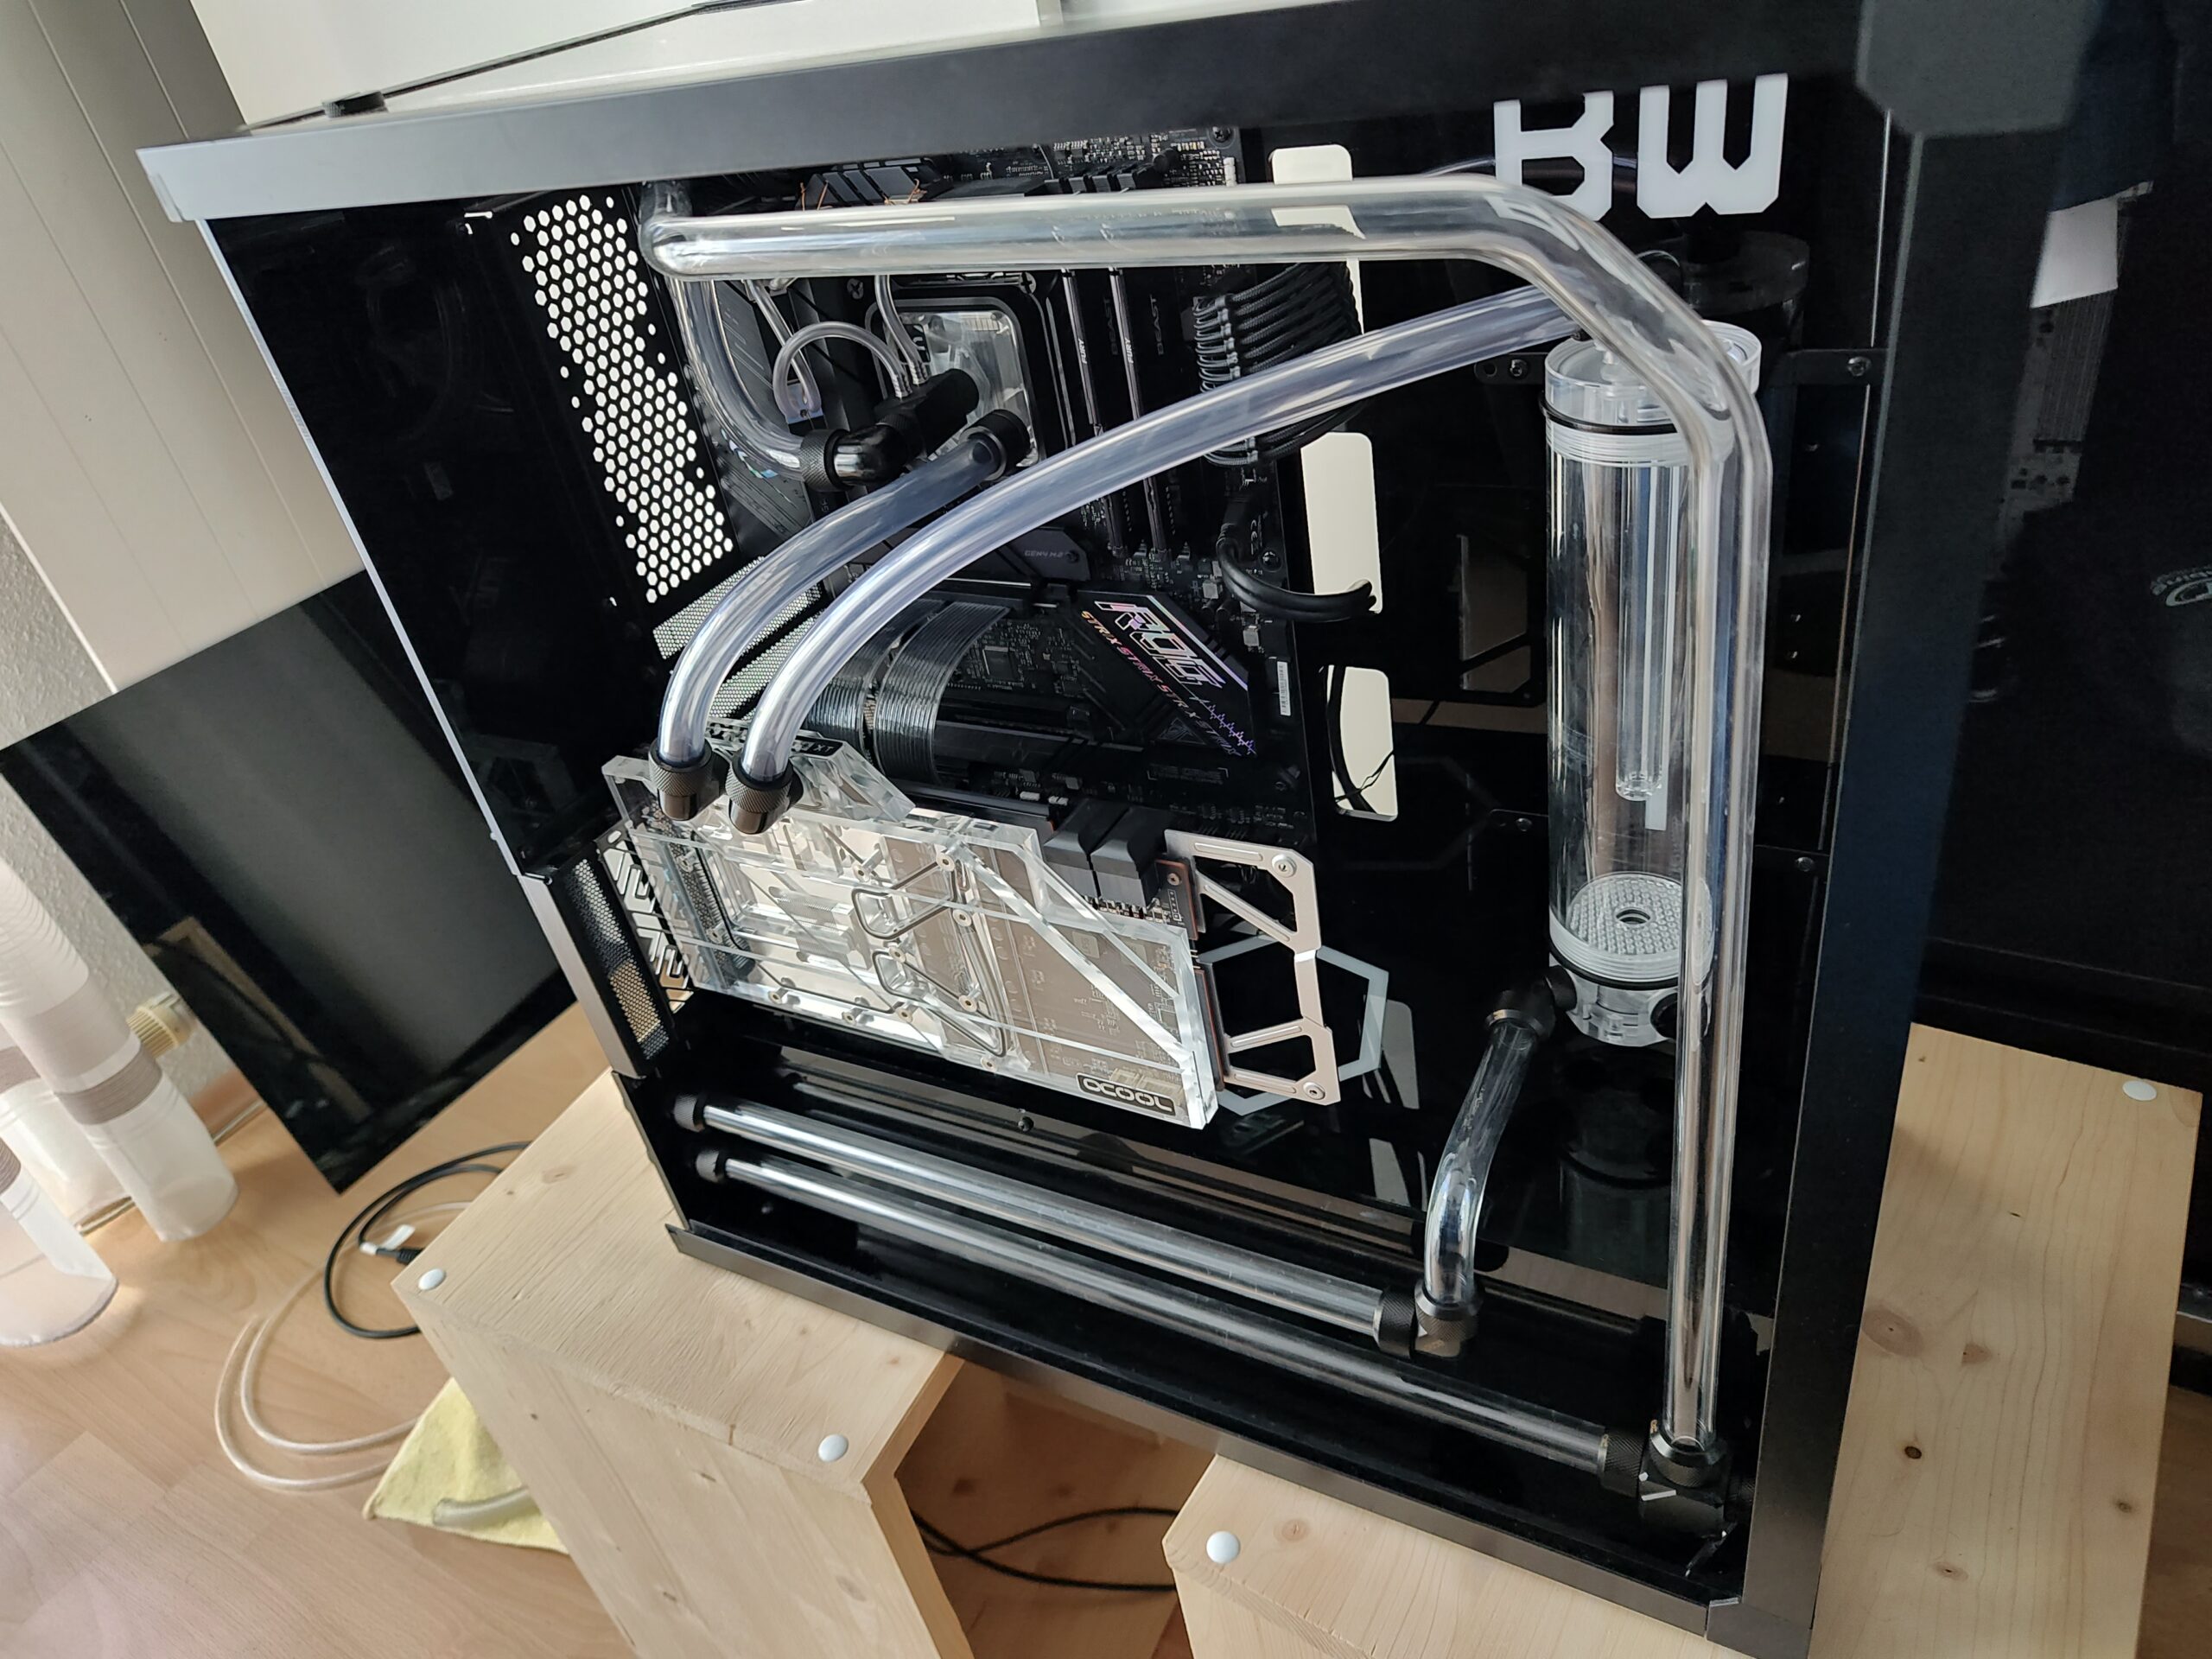
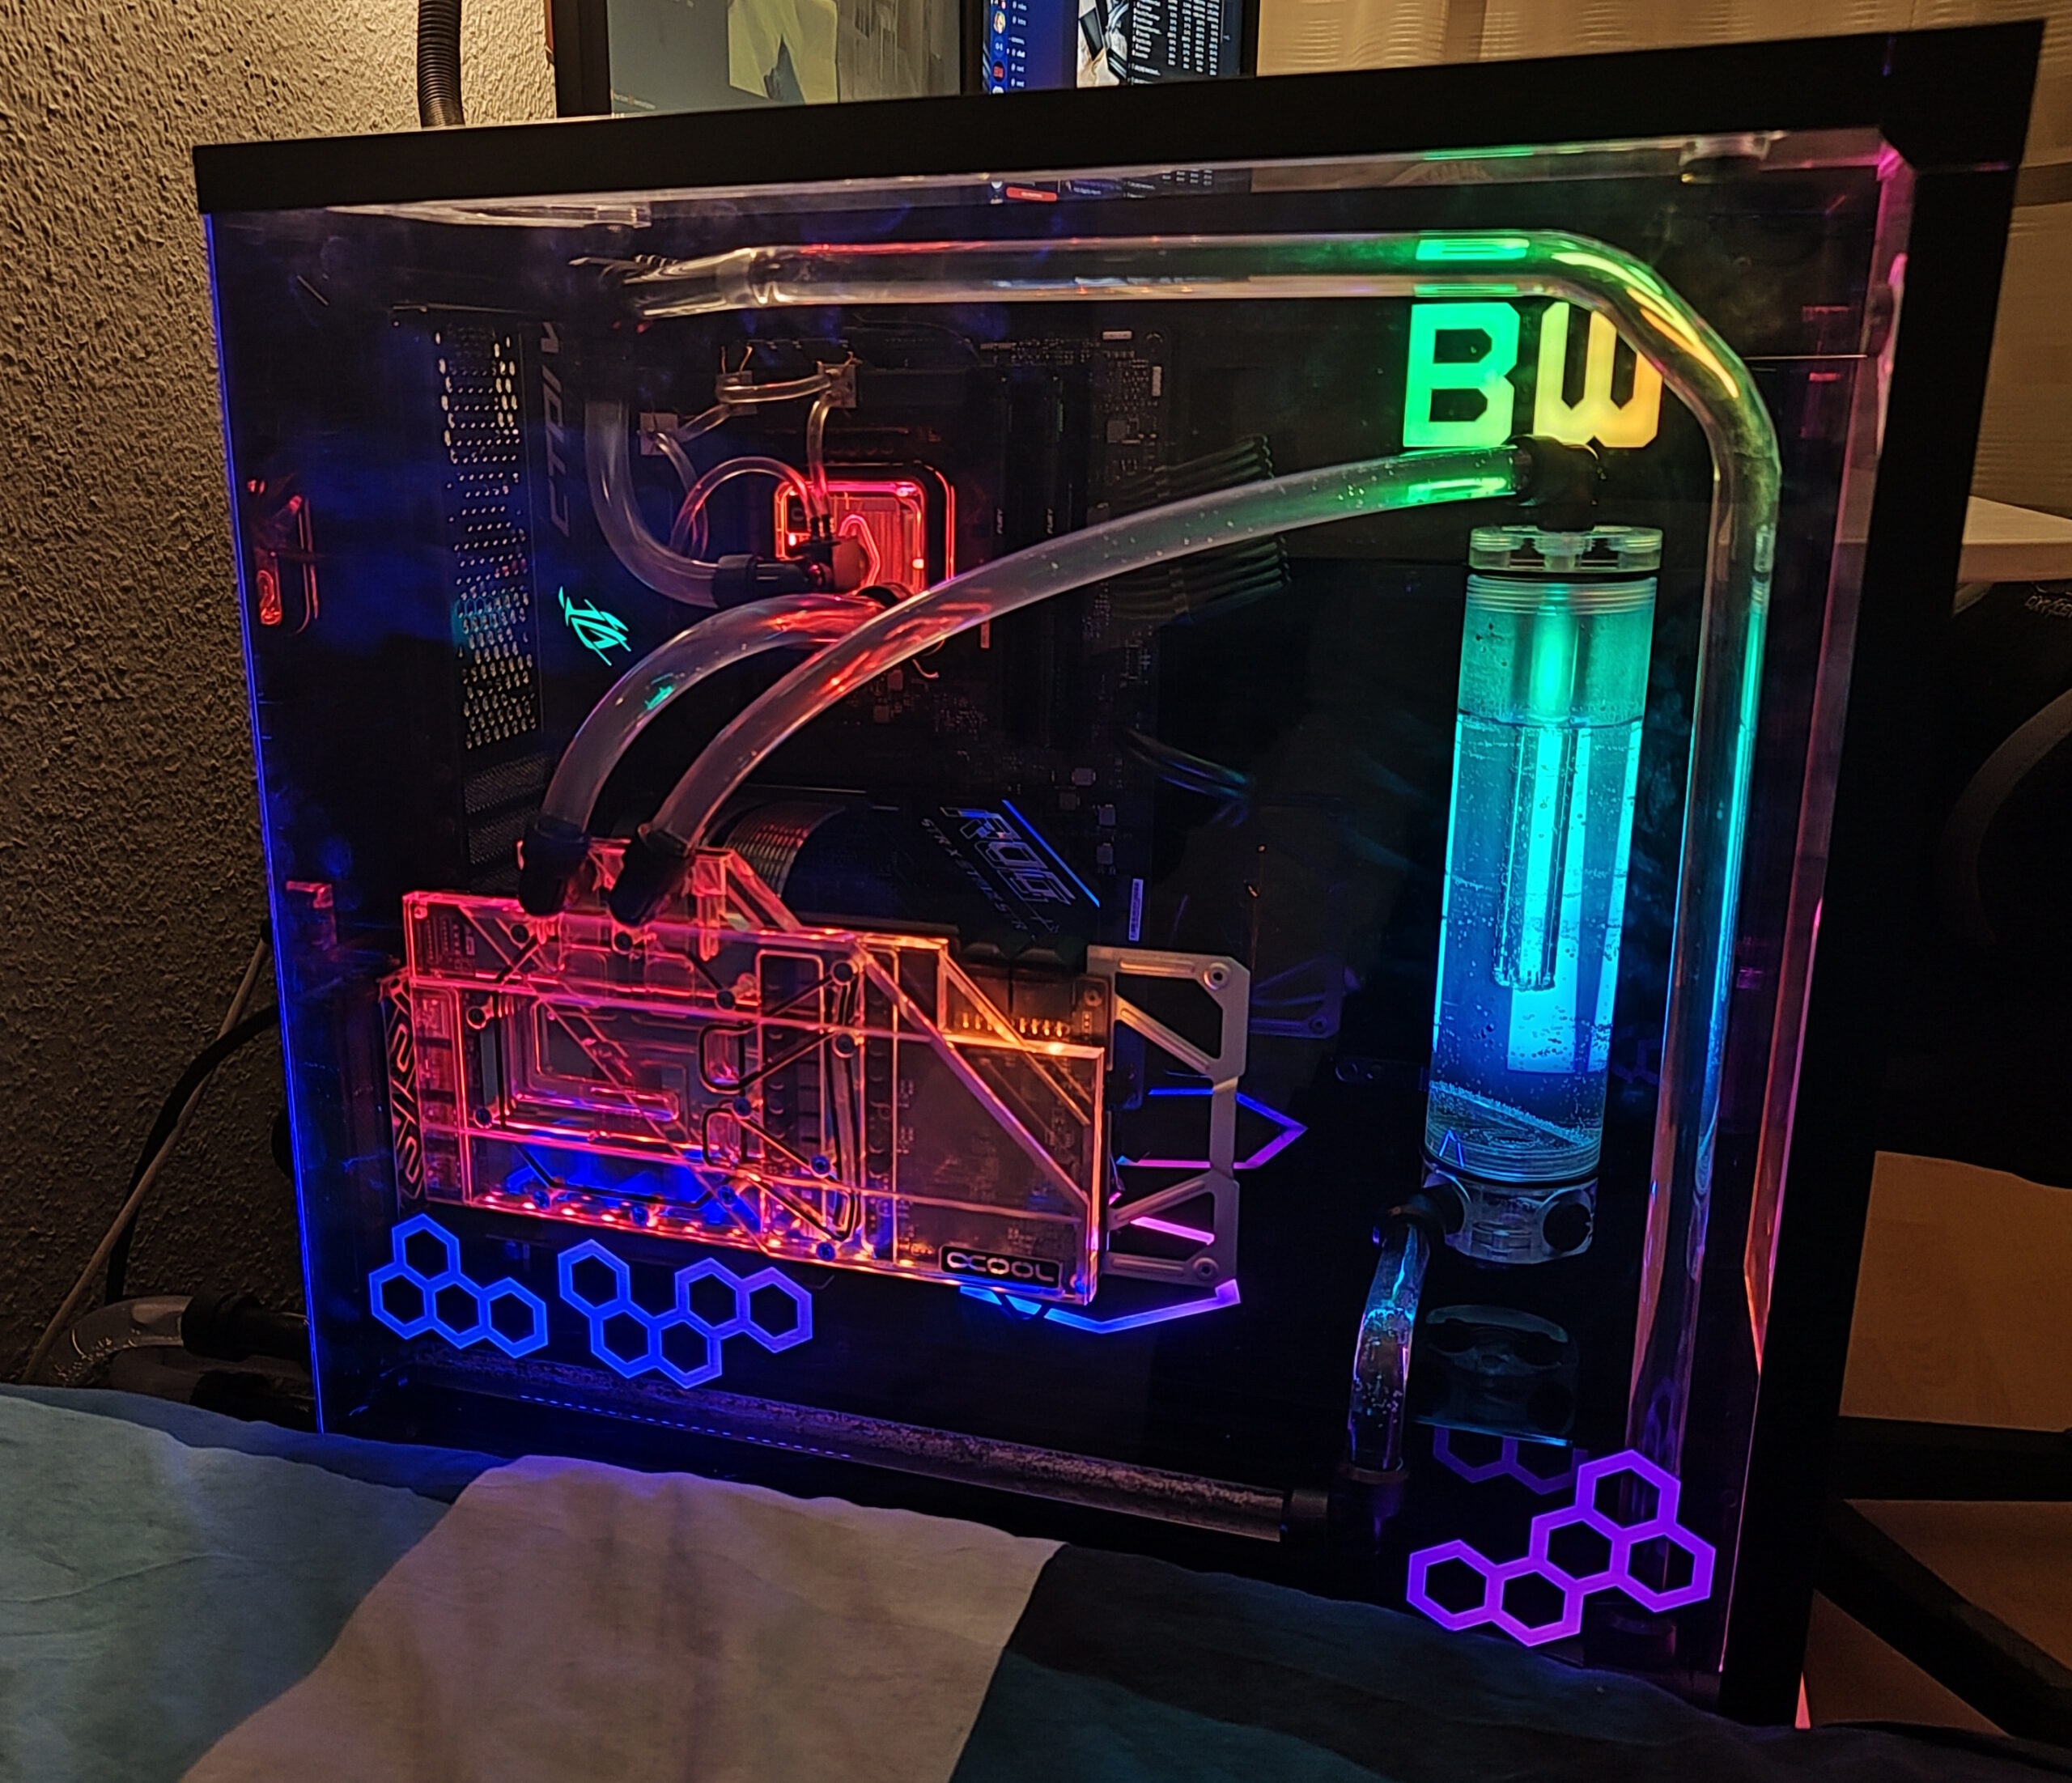
This is the current state of the project, at the time of writing. Let’s look back at it!
Leave a Reply